
The Golden Era Body Exercises of bodybuilding, a period that spanned from the 1950s to the 1970s, was a transformative time in the world of fitness. It was an era that produced legends like Arnold Schwarzenegger, Frank Zane, and Sergio Oliva, who not only redefined the sport but also became cultural icons. This was a time when bodybuilding was not just about lifting weights; it was an art form, a lifestyle, and for many, a calling.
What set this era apart was not just the physiques that seemed to defy human limitations, but also the unique and effective exercises that were the cornerstones of training routines. These exercises, often forgotten in today’s world of high-tech gym equipment and specialized workouts, were the bread and butter of the Golden Era athletes. They focused on compound movements, full-body workouts, and a deep mind-muscle connection that many argue has been lost in modern training methods.
In this article, we will explore some of these iconic exercises that defined the Golden Era of bodybuilding. From the Jefferson Deadlift to the Bradford Press, these movements offer a blend of old-school technique and timeless effectiveness. Whether you’re a seasoned athlete or a fitness enthusiast looking to spice up your routine, these exercises provide a unique way to challenge your body and pay homage to the legends who paved the way.
So, let’s take a step back in time and rediscover the exercises that made the Golden Era truly golden.
1. Jefferson Deadlift
Origin
The Jefferson Deadlift is named after Charles Jefferson, a pioneer in the world of strength training who popularized this unique variation of the traditional deadlift. While the origins of the exercise are somewhat shrouded in mystery, it is widely believed that Jefferson was an early advocate for unconventional lifting techniques that challenged the body in new ways. His approach to strength training emphasized functional movements and full-body engagement, principles that are embodied in the Jefferson Deadlift.
This exercise gained prominence during the Golden Era of bodybuilding, a time when athletes were open to experimenting with different lifting styles to achieve both strength and aesthetic goals. The Jefferson Deadlift has since become a classic movement, celebrated for its ability to engage multiple muscle groups and offer a comprehensive workout.
Though it may not be as commonly seen in modern gyms as the standard deadlift, the Jefferson Deadlift holds a special place in the annals of strength training history, serving as a testament to the innovative spirit of its namesake and the era that embraced it.
Description
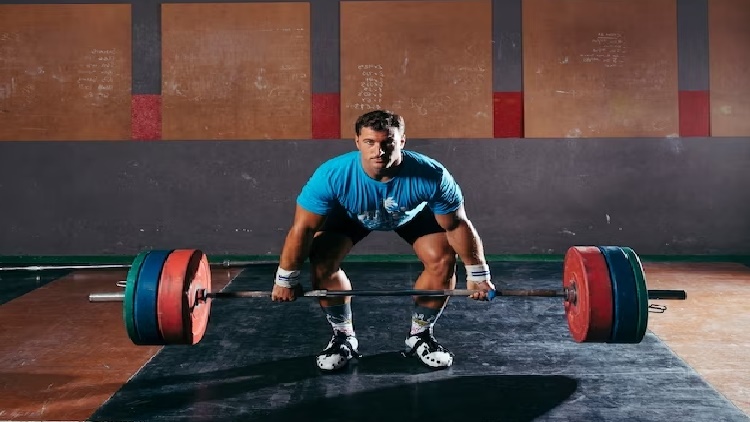
The Jefferson Deadlift is a unique and challenging variation of the traditional deadlift that involves lifting a barbell from the ground while straddling it. Unlike the conventional deadlift where the barbell is lifted in front of the legs, the Jefferson Deadlift requires you to place one leg on each side of the barbell. This setup creates a staggered stance, with one foot forward and the other foot behind the barbell.
To execute the lift, you bend at the hips and knees to grasp the barbell with a mixed grip—one hand in front of the body and the other behind. The torso is slightly twisted to accommodate this grip. As you lift the barbell, you engage your glutes, hamstrings, quadriceps, and lower back, driving through both heels to bring your body to an upright position. The barbell ascends between your legs, and you complete the lift by fully extending your hips and knees.
The unique positioning and movement pattern of the Jefferson Deadlift engage a variety of muscle groups, including:
- Glutes and Hamstrings: For hip extension.
- Quadriceps: For knee extension.
- Lower Back and Core: For spinal stability and slight rotation.
- Obliques: Due to the twisting nature of the lift.
This exercise offers a comprehensive full-body workout, targeting muscles that might not be fully activated in a standard deadlift. The asymmetrical stance and grip also challenge your balance and coordination, adding an extra layer of difficulty to the movement.
Because of its complexity and the range of muscles it engages, the Jefferson Deadlift is considered a functional exercise that mimics real-world lifting scenarios, making it a valuable addition to any strength training program.
Benefits
The Jefferson Deadlift offers a range of benefits that make it a standout exercise in any strength training regimen. Here are some of the key advantages:
- Full-Body Engagement: One of the most significant benefits is the full-body workout it provides. The exercise engages the glutes, hamstrings, quadriceps, lower back, and even the obliques, making it a comprehensive strength-building movement.
- Functional Strength: The Jefferson Deadlift is not just about building muscle; it’s also about enhancing functional strength. The movement mimics real-world lifting scenarios, such as lifting a heavy object from the floor, making it a practical exercise for everyday life.
- Muscle Imbalance Correction: The unilateral nature of the lift can help correct muscle imbalances. Lifting the weight between your legs ensures both sides of your body contribute equally, fostering balanced muscle development.
- Core Activation: The twisting motion and staggered stance engage core muscles, particularly the obliques, more than many deadlift variations. A strong core is essential for overall stability and can enhance performance in various athletic activities.
- Improved Coordination and Balance: The asymmetrical stance and grip challenge balance and coordination, essential for athleticism and daily activities.
- Versatility:The Jefferson Deadlift is versatile, fitting into various workout goals like strength, hypertrophy, or endurance for athletes at any level.
- Joint Health: The Jefferson Deadlift can be gentler on the lower back and hips than the conventional deadlift with proper form. This can make it a suitable alternative for those who experience discomfort with traditional deadlifts.
Considerations
While the Jefferson Deadlift offers numerous benefits, there are several considerations to keep in mind to perform the exercise safely and effectively:
- Proper Form: As with any complex lifting movement, proper form is crucial to avoid injury and maximize benefits. Ensure your back is straight, your core is engaged, and your grip is secure before initiating the lift.
- Foot Placement: The staggered stance requires careful attention to foot placement. Your feet should be flat on the ground, and you should feel balanced before lifting the weight. Incorrect foot placement can lead to instability and reduce the effectiveness of the exercise.
- Weight Selection: It’s advisable to start with a lighter weight to get accustomed to the unique mechanics of the Jefferson Deadlift. Once you’re comfortable with the form, you can gradually increase the weight.
- Spinal Health: The slight twisting motion involved in the Jefferson Deadlift could be a concern for those with pre-existing spinal issues. If you have any back problems, consult a healthcare provider before attempting this exercise.
- Knee and Hip Alignment: Pay attention to the alignment of your knees and hips during the lift. Misalignment can place undue stress on these joints, increasing the risk of injury.
- Warm-Up: Given the range of muscles engaged in this exercise, a thorough warm-up is essential. Include dynamic stretches and lighter lifts to prepare your body for the demands of the Jefferson Deadlift.
- Progression: As you become more comfortable with the exercise, consider incorporating variations or increasing the weight to continue challenging your body. However, always prioritize form over lifting heavier weights.
- Consult a Professional: If you’re new to this exercise or have any specific health concerns, it’s always a good idea to consult a certified fitness professional for personalized guidance.
2. Cross Bench Pullover (Golden Era Body Exercises)
Variation
The Cross Bench Pullover is a versatile exercise that can be performed in various ways to target different muscle groups and achieve specific fitness goals. Here, we’ll explore a variation of the Cross Bench Pullover to add variety to your workout routine:
Dumbbell Cross Bench Pullover
Equipment Needed: Dumbbell, flat bench or a stability ball
Focus Muscle Groups: Pectoral muscles, latissimus dorsi, triceps, and serratus anterior
Execution:
- Setup: Begin by placing a dumbbell near the end of a flat bench or a stability ball. Sit on the bench or ball and carefully roll back until your upper back and shoulders are positioned on the bench, and your hips are below the bench’s surface. Ensure that your head is supported and your feet are flat on the floor.
- Grip the Dumbbell: Reach for the dumbbell with both hands, holding it with your palms facing upward and your arms extended.
- Movement: Lower the dumbbell back and slightly downward, keeping your arms extended. Your goal is to achieve a stretch in your chest and lats.
- Engage Muscles: From the stretched position, use your chest, lats, and triceps to pull the dumbbell back up to the starting position.
- Repeat: Perform the desired number of repetitions, focusing on the stretch and contraction of the targeted muscle groups.
Benefits:
- Enhanced Chest Engagement: This variation emphasizes chest engagement more than the standard Cross Bench Pullover, making it an excellent choice for chest development.
- Lat Activation: While the standard version primarily targets the lats, this variation also engages the latissimus dorsi muscles effectively.
- Triceps and Serratus Anterior: The triceps and serratus anterior muscles play a supportive role in this exercise, contributing to overall upper body strength and stability.
- Versatility: Adding a dumbbell to the Cross Bench Pullover provides versatility to your workout routine, allowing you to adjust the weight according to your fitness level and goals.
Technique
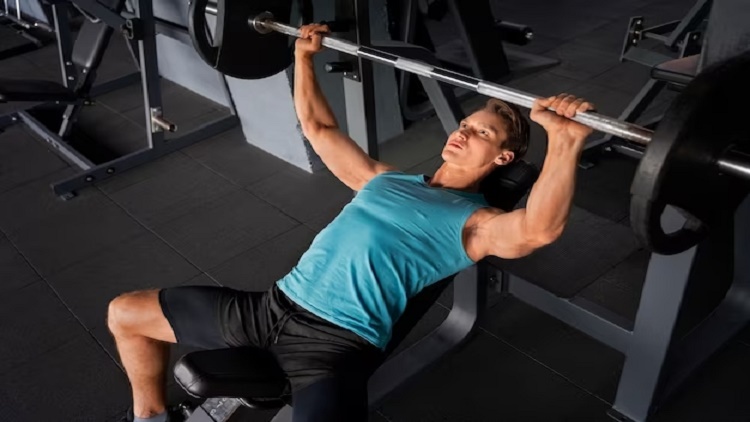
The Cross Bench Pullover is an effective exercise that primarily targets the chest, lats, and serratus anterior muscles. Proper technique is essential for maximizing its benefits and preventing injury. Here’s a step-by-step guide on how to perform the Cross Bench Pullover with correct form:
Equipment Needed: Flat bench, barbell or dumbbell
Setup:
- Position: Begin by sitting on a flat bench with your feet flat on the floor, shoulder-width apart. Your knees should be bent at a 90-degree angle, and your head should be resting comfortably on the bench.
- Grip: Reach for the barbell or dumbbell behind you. If using a barbell, grip it with both hands, palms facing upward, and hands slightly wider than shoulder-width apart. If using a dumbbell, hold it with both hands, palms placed underneath one end of the dumbbell.
Movement:
- Starting Position: Begin with the weight held directly above your chest, fully extended, and your arms nearly straight but not locked. This is your starting position.
- Inhale: Take a deep breath in preparation for the movement.
- Lower the Weight: Lower the weight slowly and with control behind your head while keeping your arms slightly bent. Your elbows should point slightly outward, not directly to the sides.
- Stretch and Hold: Continue lowering the weight until you feel a comfortable stretch in your chest and lats. Hold this position briefly, feeling the stretch.
- Exhale and Return: Exhale and use your chest and lats to pull the weight back to the starting position. Focus on the muscles contracting as you bring the weight back up.
- Repeat: Perform the desired number of repetitions, maintaining control throughout the movement.
Key Points:
- Keep your core engaged and your lower back pressed firmly against the bench to maintain stability.
- Maintain a slight bend in your elbows throughout the exercise to avoid excessive strain on the joints.
- Focus on the stretch in your chest and lats as you lower the weight, and then concentrate on the contraction as you bring it back up.
- Use a weight that allows you to perform the exercise with proper form. As you become more experienced, you can gradually increase the weight.
- Avoid using momentum to lift the weight; the movement should be controlled and deliberate.
The Cross Bench Pullover is an effective exercise for targeting the chest, lats, and serratus anterior muscles. By following these technique guidelines, you can perform it safely and effectively, reaping the benefits of enhanced upper body strength and muscle development.
Benefits
The Cross Bench Pullover is a classic exercise that offers a range of benefits, primarily focusing on the development of the chest, lats, and serratus anterior muscles. Incorporating this exercise into your workout routine can yield the following advantages:
1. Chest Development:
Isolated Chest Engagement: The Cross Bench Pullover is an excellent exercise for isolating and targeting the pectoral muscles (chest). It effectively engages the chest throughout the range of motion, helping to enhance chest development.
2. Latissimus Dorsi Activation:
Lats Strengthening: This exercise significantly activates the latissimus dorsi muscles (lats), which are the broad muscles of the back. Strengthening the lats contributes to improved back aesthetics, posture, and overall upper body strength.
3. Serratus Anterior Engagement:
Serratus Anterior Development: The serratus anterior muscles are responsible for the “boxer’s muscle” appearance on the sides of the ribcage. The Cross Bench Pullover engages the serratus anterior, aiding in its development and contributing to shoulder stability.
4. Shoulder Mobility:
Shoulder Flexibility: This exercise requires a full range of motion in the shoulder joint. Regularly performing Cross Bench Pullovers can help enhance shoulder flexibility and mobility.
5. Breathing and Ribcage Expansion:
Respiratory Benefits: This exercise encourages deep breathing as you lower the weight behind your head and expand your ribcage. It can contribute to improved lung capacity and breathing mechanics.
6. Versatility:
Equipment Options: The Cross Bench Pullover can be performed with various equipment, including a barbell, dumbbell, or even a cable machine. This versatility allows you to choose the equipment that best suits your preferences and goals.
7. Postural Benefits:
Improved Posture: Strengthening the lats and serratus anterior muscles can promote better posture by aiding in shoulder stability and alignment.
8. Functional Strength:
Functional Applications: The Cross Bench Pullover mimics movements that involve overhead reaching and lifting, making it useful for improving functional strength in daily activities and sports.
9. Aesthetic Benefits:
Upper Body Aesthetics: Regularly incorporating this exercise into your routine can contribute to a more balanced and aesthetically pleasing upper body appearance, with well-developed chest and back muscles.
Incorporating the Cross Bench Pullover into your workout routine can provide a comprehensive upper body workout, targeting key muscle groups and promoting both strength and aesthetics. Whether you’re focused on building muscle, improving posture, or enhancing functional strength, this exercise can be a valuable addition to your fitness regimen.
Considerations (Golden Era Body Exercises)
While the Cross Bench Pullover offers numerous benefits for chest, back, and shoulder development, it’s essential to consider certain factors to perform the exercise safely and effectively:
Proper Form:
- Focus on Technique: Maintaining proper form and technique is crucial to avoid unnecessary strain or injury. Ensure that you execute the exercise with control and precision, particularly during the lowering and raising phases.
- Elbow Position: Pay attention to the position of your elbows during the movement. They should point slightly outward, not directly to the sides, to optimize muscle engagement and reduce stress on the shoulder joint.
- Range of Motion: Use a full range of motion, but avoid overextending your shoulders when lowering the weight behind your head.
Warm-Up:
Muscle Warm-Up: Prior to performing this exercise, include a thorough warm-up routine that targets the chest, lats, and shoulders to prepare these muscles for the Cross Bench Pullover.
Weight Selection:
Appropriate Weight: Choose an appropriate weight that allows you to perform the exercise with proper form. Starting with lighter weights and gradually increasing the resistance as you become more proficient is advisable.
Existing Injuries or Conditions:
Shoulder Health: Individuals with shoulder issues or a history of shoulder injuries should exercise caution when performing this exercise. If you have concerns about the impact on your shoulders, consult a healthcare provider or physical therapist for guidance.
Breathing:
Breathing Control: Pay attention to your breathing pattern during the exercise. Inhale as you lower the weight and exhale as you raise it back up. Controlled breathing can help you maintain stability and control.
Alternative Exercises:
Variation Options: If you find that the Cross Bench Pullover causes discomfort or is not suitable for your current fitness level, consider alternative chest and back exercises that may be more appropriate.
Progression:
Gradual Progression: As you become more experienced, you can progressively increase the weight and intensity of the Cross Bench Pullover to continue challenging your muscles effectively.
Rest and Recovery:
Proper Recovery: Allow adequate time for your chest, lats, and shoulders to recover between workouts. Overtraining can lead to muscle fatigue and potential injury, so incorporate rest into your training routine.
By considering these factors and exercising caution, you can perform the Cross Bench Pullover safely and effectively, reaping the benefits of enhanced upper body strength and muscle development while minimizing the risk of injury.
3. Lying Crossbody Dumbbell Triceps Extension
Focus
The Lying Crossbody Dumbbell Triceps Extension is an isolation exercise primarily designed to target the triceps brachii muscle group. Understanding its focus is essential for performing the exercise effectively and achieving your fitness goals. Here’s an overview of the primary focus of this exercise:
Triceps Isolation
The central focus of the Lying Crossbody Dumbbell Triceps Extension is the isolation of the triceps muscles. The triceps brachii, located on the back of the upper arm, consists of three heads: the long head, the lateral head, and the medial head. This exercise specifically targets the lateral head of the triceps.
Lateral Head Emphasis
While the exercise engages all three heads of the triceps to some extent, it places particular emphasis on the lateral head. The lateral head is the outermost portion of the triceps and contributes significantly to the overall shape and definition of the arm.
Muscle Contraction
During the Lying Crossbody Dumbbell Triceps Extension, the primary focus is on contracting the triceps effectively. This means that the lateral head of the triceps should be actively engaged throughout the movement, from the starting position to the fully extended position.
Extension Movement
The primary movement involved in this exercise is the extension of the elbow joint. As you lift the dumbbell from the starting position to a fully extended position, the lateral head of the triceps contracts concentrically to move the weight.
Strengthening and Toning
By focusing on the lateral head of the triceps, the exercise is particularly effective for strengthening and toning this muscle group. It can contribute to improved arm definition and increased triceps strength, which can benefit various activities that involve pushing or extending the arms.
In summary, the Lying Crossbody Dumbbell Triceps Extension is a specialized exercise with a primary focus on isolating and developing the lateral head of the triceps. Understanding this focus is key to performing the exercise correctly and reaping its benefits for arm strength and definition.
Emphasis
The Lying Crossbody Dumbbell Triceps Extension places specific emphasis on the lateral head of the triceps brachii muscle group. Understanding this emphasis is essential for performing the exercise effectively and achieving targeted triceps development. Here’s a closer look at the emphasis of this exercise:
Targeting the Lateral Head
The primary focus of the Lying Crossbody Dumbbell Triceps Extension is to isolate and emphasize the lateral head of the triceps muscle. The lateral head is the outermost portion of the triceps and plays a significant role in defining the shape of the upper arm.
Isolation and Concentric Contraction
During the execution of this exercise, the primary emphasis is on isolating the lateral head of the triceps and inducing a concentric contraction. Concentric contraction occurs when the muscle shortens as it contracts against resistance. In this case, the lateral head of the triceps contracts forcefully as you extend your arm from a bent position to a fully extended position.
Controlled Movement
To maximize the emphasis on the lateral head, it’s essential to maintain control throughout the exercise. Control the dumbbell as you lower it toward your shoulder and focus on the controlled extension of the elbow to emphasize the lateral triceps muscle.
Triceps Definition
By emphasizing the lateral head of the triceps, this exercise contributes to improved triceps definition and shape. A well-developed lateral head can enhance the appearance of the arm and contribute to overall upper body aesthetics.
Muscle Engagement
While the lateral head receives the primary emphasis, the long head and medial head of the triceps are also engaged to some extent during the exercise. However, the lateral head is the primary driver of the movement and experiences the greatest degree of stress and tension.
Strengthening and Toning
The Lying Crossbody Dumbbell Triceps Extension is particularly effective for strengthening and toning the lateral triceps. It is a valuable addition to a comprehensive arm training routine, especially if your goal is to improve triceps strength and appearance.
In summary, the Lying Crossbody Dumbbell Triceps Extension is a specialized exercise designed to place emphasis on the lateral head of the triceps. Understanding this emphasis is key to executing the exercise with precision and achieving targeted triceps development.
Benefits (Golden Era Body Exercises)
The Lying Crossbody Dumbbell Triceps Extension is an effective exercise that offers several benefits for those looking to target and strengthen their triceps. Here are some of the key advantages of incorporating this exercise into your workout routine:
1. Targeted Triceps Development:
Lateral Head Emphasis: This exercise places specific emphasis on the lateral head of the triceps, contributing to the overall development of this muscle group. A well-defined lateral head enhances the appearance of the upper arm, providing a more sculpted look.
2. Muscle Isolation:
Focused Engagement: The exercise isolates the triceps brachii, particularly the lateral head, allowing for concentrated and effective muscle engagement. This can lead to improved muscle definition and strength in the triceps.
3. Arm Aesthetics:
Improved Definition: By targeting the lateral head of the triceps, the exercise can help improve the aesthetic appearance of the arms, especially when combined with a well-rounded arm training routine.
4. Functional Strength:
Enhanced Pushing Power: Strong triceps are essential for various pushing movements, such as bench pressing, push-ups, and overhead presses. Strengthening the triceps through exercises like the Lying Crossbody Dumbbell Triceps Extension can improve your performance in these activities.
5. Versatility:
Variation Options: This exercise can be adapted to different fitness levels and goals. You can adjust the weight of the dumbbell or modify the number of sets and repetitions to match your specific training objectives.
6. Reduced Imbalances:
Muscle Balance: If you have developed muscle imbalances in your arms, emphasizing the lateral head of the triceps can help correct these imbalances, promoting balanced muscle development.
7. Time Efficiency:
Isolation Focus: The Lying Crossbody Dumbbell Triceps Extension allows you to target the triceps efficiently, making it a valuable addition to your arm training routine without the need for extensive equipment or time.
8. Injury Prevention:
Strengthened Triceps: Strengthening the triceps can contribute to overall shoulder and elbow joint stability, potentially reducing the risk of injuries in these areas.
In summary, the Lying Crossbody Dumbbell Triceps Extension offers specific benefits for triceps development, muscle isolation, and arm aesthetics. It can be a valuable addition to your workout routine, especially if you’re looking to enhance triceps strength and appearance.
Considerations
While the Lying Crossbody Dumbbell Triceps Extension is a valuable exercise for targeting and strengthening the triceps, it’s essential to consider certain factors to perform it safely and effectively:
Proper Form:
- Focus on Technique: Maintaining proper form and technique is crucial to avoid unnecessary strain or injury. Ensure that you execute the exercise with control and precision.
- Elbow Position: Pay attention to the position of your elbows during the movement. Keep them relatively close to your head to emphasize the lateral head of the triceps and reduce stress on the shoulder joint.
- Range of Motion: Use a full range of motion, lowering the dumbbell towards your shoulder and extending your arm fully to emphasize triceps engagement.
Warm-Up:
Triceps Warm-Up: Prior to performing this exercise, include a specific triceps warm-up routine to prepare the muscles for the exercise and reduce the risk of injury.
Weight Selection:
Appropriate Weight: Choose an appropriate dumbbell weight that allows you to perform the exercise with proper form. Avoid using excessively heavy weights that may compromise your technique.
Existing Injuries or Conditions:
Shoulder Health: Individuals with shoulder issues or a history of shoulder injuries should exercise caution when performing this exercise. If you have concerns about the impact on your shoulders, consult a healthcare provider or physical therapist for guidance.
Alternative Exercises:
Variation Options: If you find that the Lying Crossbody Dumbbell Triceps Extension causes discomfort or is not suitable for your current fitness level, consider alternative triceps exercises that may be more appropriate.
Progression:
Gradual Progression: As you become more proficient with the exercise, you can progressively increase the weight and intensity to continue challenging your triceps effectively.
Rest and Recovery:
Proper Recovery: Allow adequate time for your triceps muscles to recover between workouts. Overtraining can lead to muscle fatigue and potential injury, so incorporate rest into your training routine.
By considering these factors and exercising caution, you can perform the Lying Crossbody Dumbbell Triceps Extension safely and effectively, reaping the benefits for triceps development while minimizing the risk of injury.
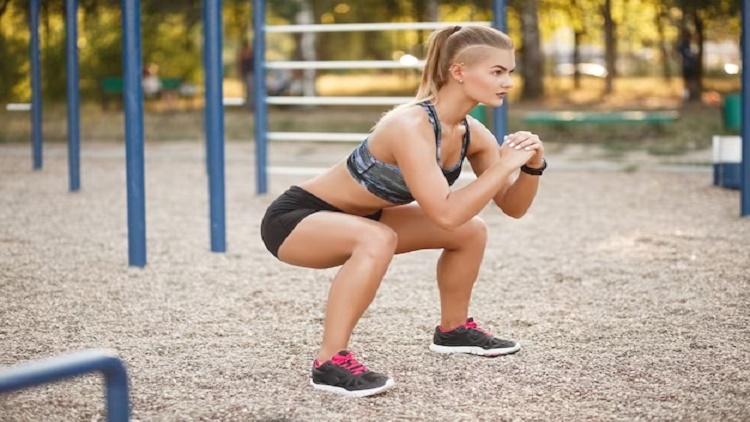
4. Sissy Squats (Golden Era Body Exercises)
Benefit
Sissy Squats are a specialized form of squat that places a unique emphasis on the quadriceps, making them an excellent exercise for targeting this specific muscle group. Here’s a closer look at its primary benefit:
Quadriceps Isolation
The standout benefit of Sissy Squats is the exceptional isolation of the quadriceps muscles. Unlike traditional squats, which engage a variety of lower body muscles including the glutes and hamstrings, Sissy Squats focus almost exclusively on the quads. This makes them an excellent exercise for:
- Muscle Hypertrophy: If you’re looking to build size in your quadriceps, the targeted nature of Sissy Squats makes them an effective choice for hypertrophy training.
- Muscle Endurance: The exercise can also be performed for higher repetitions to improve muscular endurance, particularly in the quads.
- Muscle Activation: Sissy Squats are excellent for activating the quadriceps, making them a useful addition to any leg training routine, either as a primary exercise or as an accessory movement to complement other leg exercises.
- Functional Strength: Despite the isolation focus, strong quadriceps are essential for various functional movements and athletic activities, making Sissy Squats beneficial beyond just aesthetics.
In summary, the primary benefit of Sissy Squats is the exceptional isolation and targeting of the quadriceps, making them a valuable exercise for anyone looking to improve strength, size, or endurance in this specific muscle group.
Caution (Golden Era Body Exercises)
While Sissy Squats offer excellent benefits, especially for quadriceps development, they should be approached with caution due to the specific demands they place on the knees and lower back. Here are some cautionary points to consider:
- Knee Health: Sissy Squats place a significant amount of stress on the knee joints. If you have pre-existing knee issues or are prone to knee injuries, consult a healthcare provider before incorporating this exercise into your routine.
- Proper Technique: Incorrect form can exacerbate the stress on the knees and lower back. Make sure to learn the proper technique and consider using a Sissy Squat machine or bench for added support if you’re new to the exercise.
- Weight Selection: While it’s tempting to add weight for increased resistance, doing so without proper form can lead to injury. Start with body weight and master the technique before adding additional sistance.
- Warm-Up: Given the targeted nature of the exercise, a thorough warm-up focusing on the lower body is essential to prepare the muscles and joints for the movement.
- Progressive Overload: While it’s important to challenge yourself, sudden increases in weight or volume can lead to injury. Follow a progressive overload principle, gradually increasing the intensity over time.
- Consult a Professional: If you’re new to Sissy Squats or have specific health concerns, it’s advisable to consult a certified fitness professional for personalized guidance and supervision.
By being cautious and mindful of these points, you can enjoy the benefits of Sissy Squats while minimizing the risks. As always, consult a healthcare provider or certified fitness professional before attempting new exercises, especially those that are complex or may have specific health considerations.
Technique
Executing Sissy Squats with proper technique is essential for maximizing their benefits while minimizing the risk of injury. Here’s a step-by-step guide on how to perform this specialized squat variation:
Setup
- Starting Position: Stand upright with your feet shoulder-width apart. You can hold onto a sturdy support like a squat rack or pole for balance if needed.
- Hand Placement: Place your hands on your hips or extend them out in front of you for balance.
Execution
- Engage Core: Tighten your core and keep your chest lifted to maintain an upright posture throughout the exercise.
- Initiate Movement: Begin by pushing your hips slightly forward while simultaneously lifting your heels off the ground.
- Lowering Phase: As your hips move forward and your heels lift, bend your knees to lower your body towards the ground. Aim to go as low as your flexibility and strength allow, ideally until your thighs are almost parallel to the ground.
- Bottom Position: At the lowest point, your body should form a straight line from your head to your knees.
- Lifting Phase: Push through the balls of your feet to extend your knees and return to the starting position.
Key Points
- Knee Alignment: Ensure that your knees are aligned with your toes throughout the movement to minimize stress on the knee joints.
- Heel Lift: Lifting the heels is crucial for the targeted engagement of the quadriceps. Make sure to maintain this position throughout the exercise.
- Core Engagement: A strong core is essential for maintaining balance and protecting your lower back.
- Controlled Movement: Perform the exercise in a controlled manner, focusing on the muscle contraction rather than the speed of the movement.
- Breathing: Inhale as you lower your body and exhale as you return to the starting position.
By adhering to these technique guidelines, you can perform Sissy Squats effectively and safely, making the most of this quadriceps-focused exercise.
Benefits
Sissy Squats offer a unique set of benefits that make them a valuable addition to any leg-focused workout routine. Here are some of the key advantages:
- Quadriceps Isolation: The primary benefit of Sissy Squats is the exceptional isolation of the quadriceps muscles. This makes them an excellent choice for targeted hypertrophy and strength development in the quads.
- Muscle Activation: The exercise provides a high level of muscle activation in the quadriceps, making it a useful accessory movement to complement other leg exercises like traditional squats or leg presses.
- Functional Strength: Despite being an isolation exercise, Sissy Squats can contribute to functional strength, particularly in movements that require strong quadriceps, such as climbing stairs or sprinting.
- Flexibility: The range of motion involved in Sissy Squats can help improve flexibility in the knees and ankles, which is beneficial for both athletic performance and daily activities.
- Balance and Coordination: Performing Sissy Squats requires a good sense of balance and body awareness, helping to improve these skills over time.
- Convenience: Sissy Squats can be performed with minimal equipment, making them a convenient exercise option. You can even perform them at home if you have a sturdy support to hold onto.
- Variability: The exercise can be easily modified to suit different fitness levels. Beginners can use body weight and hold onto a support, while more advanced individuals can add resistance with weights or resistance bands.
Considerations (Golden Era Body Exercises)
While Sissy Squats are a valuable exercise for targeting the quadriceps, there are several considerations to keep in mind to ensure you perform them safely and effectively:
- Knee Health: Due to the specific mechanics of the exercise, Sissy Squats can place considerable stress on the knee joints. If you have a history of knee issues or are currently experiencing knee pain, consult a healthcare provider before incorporating this exercise.
- Proper Form: As with any exercise, proper form is crucial for maximizing benefits and minimizing the risk of injury. Make sure to maintain a straight back, aligned knees, and controlled movements throughout the exercise.
- Weight Selection: If you choose to add weight for increased resistance, start with a light load to ensure you can maintain proper form. Gradually increase the weight as you become more comfortable with the exercise.
- Foot Placement: Ensure your feet are flat on the ground and shoulder-width apart to maintain balance and stability during the exercise.
- Warm-Up: Given the targeted nature of the exercise, a thorough warm-up is essential. Include dynamic stretches and lighter exercises to prepare your quadriceps and knee joints for the movement.
- Progression: As you become more proficient in the exercise, consider incorporating variations or adding resistance to continue challenging your muscles. However, always prioritize form and safety.
- Consult a Professional: If you’re new to Sissy Squats or have specific health concerns, it’s advisable to consult a certified fitness professional for personalized guidance and proper technique instruction.
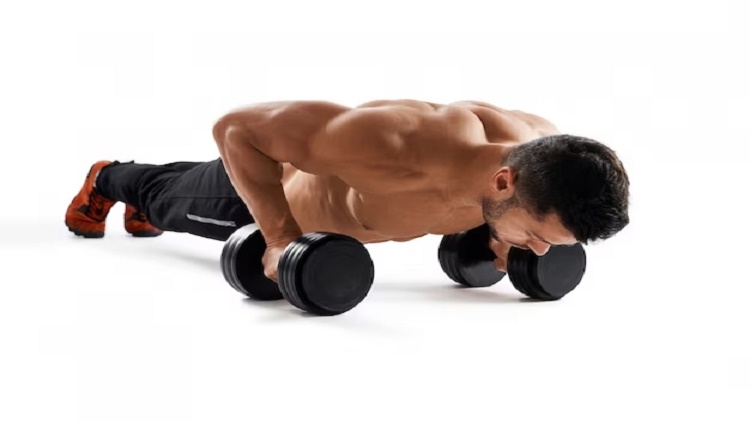
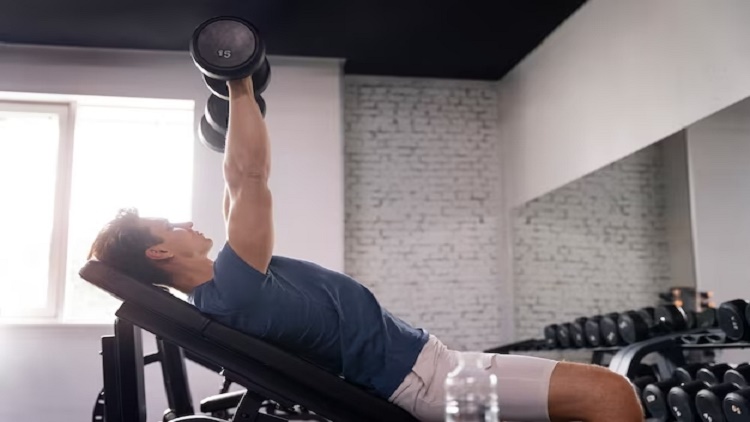
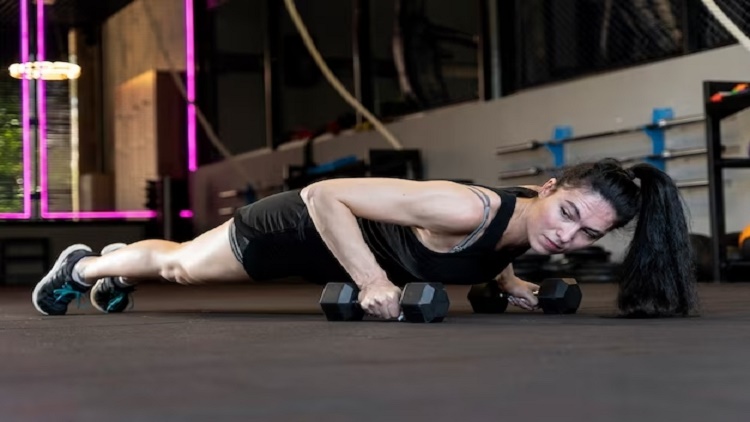
5. Dumbbell Glute Bridge Floor Press
Composition
The Dumbbell Glute Bridge Floor Press is a hybrid exercise that combines elements of the traditional glute bridge with the dumbbell floor press. This unique composition allows for simultaneous targeting of the lower body and upper body, making it a highly efficient and versatile exercise. Here’s a breakdown of its composition:
Glute Bridge Component
- Muscle Groups: Targets the glutes, hamstrings, and lower back.
- Movement: Hip extension while maintaining a bridge position.
- Purpose: To build strength and power in the lower body, particularly the glutes and hamstrings, while also engaging the core for stability.
Dumbbell Floor Press Component
- Muscle Groups: Targets the chest, shoulders, and triceps.
- Movement: Pressing dumbbells towards the ceiling while lying on the floor.
- Purpose: To build upper body strength, focusing on the pectoral muscles and triceps, with secondary engagement of the shoulders.
Combined Movement
- Execution: While holding the glute bridge position, perform a dumbbell floor press. This requires coordination and stability as you engage both your lower and upper body.
- Muscle Engagement: The combined movement engages a wide array of muscle groups, from the glutes and hamstrings to the chest and triceps, making it a full-body exercise.
By merging these two exercises into one, the Dumbbell Glute Bridge Floor Press offers a comprehensive workout that can save time while still providing the benefits of targeted muscle engagement.
Benefit
The Dumbbell Glute Bridge Floor Press is a unique exercise that offers a range of benefits, combining both lower body and upper body engagement in a single movement. Here are some of the key advantages:
Full-Body Engagement
One of the standout benefits of the Dumbbell Glute Bridge Floor Press is its ability to engage multiple muscle groups simultaneously, providing a comprehensive full-body workout:
- Lower Body: The glute bridge component targets the glutes, hamstrings, and lower back, helping to develop strength and power in the posterior chain.
- Upper Body: The dumbbell floor press engages the chest, shoulders, and triceps, contributing to upper body strength and muscle development.
- Core: Throughout the exercise, the core muscles are actively engaged to stabilize the body in the bridge position, adding a significant core strengthening element.
Time Efficiency
Combining two exercises into one makes the Dumbbell Glute Bridge Floor Press a time-efficient choice for those looking to maximize their workout in a shorter period. Instead of separately targeting the lower and upper body, you can work on both simultaneously.
Functional Strength
The exercise’s composition promotes functional strength, as it mimics real-world movements that often require both upper and lower body coordination. This can translate to improved performance in daily activities and sports.
Versatility (Golden Era Body Exercises)
The Dumbbell Glute Bridge Floor Press can be adapted to different fitness levels and goals. You can adjust the weight of the dumbbells or use variations of the exercise to suit your needs, whether you’re focusing on strength, hypertrophy, or endurance.
In summary, the Dumbbell Glute Bridge Floor Press offers a multifaceted approach to strength training, targeting various muscle groups and providing time-efficient full-body workouts.
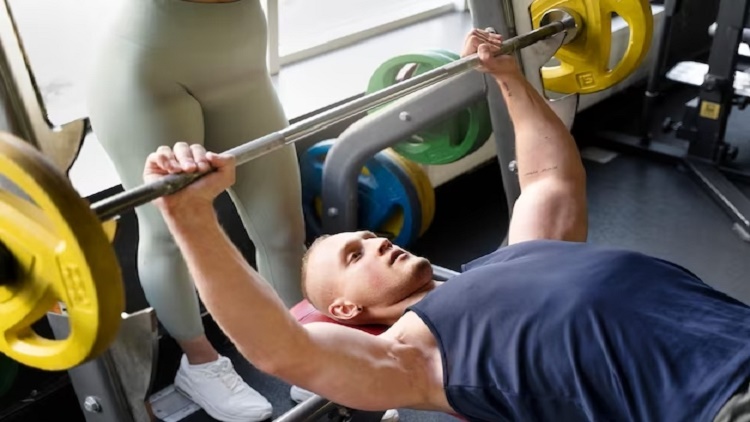
Technique
Executing the Dumbbell Glute Bridge Floor Press with proper technique is essential for maximizing its benefits and ensuring safety. Here’s a step-by-step guide on how to perform this exercise correctly:
Setup
- Position: Lie on your back on the floor with your knees bent and your feet flat on the ground. Your feet should be hip-width apart.
- Dumbbell Placement: Hold a dumbbell in each hand, positioning them on either side of your chest with your palms facing away from your body.
Glute Bridge Component
- Engage Core: Tighten your core muscles to maintain a stable bridge position.
- Hip Lift: Push through your heels to lift your hips off the floor. Your body should form a straight line from your shoulders to your knees at the top of the bridge position.
- Hold: At the top of the glute bridge, pause briefly to ensure your hips are fully extended.
Dumbbell Floor Press Component
- Upper Body Setup: While maintaining the bridge position, your upper body should remain stationary. Your head, shoulders, and upper back should stay on the floor.
- Dumbbell Press: Begin the dumbbell press by extending your arms and pressing the dumbbells upward until your arms are fully extended but not locked at the elbows.
- Controlled Descent: Lower the dumbbells back to the starting position, maintaining the bridge throughout the movement.
- Repeat: Perform the desired number of repetitions while keeping the glute bridge engaged.
Key Points
- Breathing: Inhale as you lower the dumbbells and exhale as you press them upward.
- Controlled Movements: Ensure that the movements are controlled and deliberate. Avoid using momentum to lift the dumbbells.
- Dumbbell Alignment: Keep the dumbbells aligned with your chest throughout the press, and avoid allowing them to drift forward or backward.
- Full Range of Motion: Aim for a full range of motion, lowering the dumbbells until your upper arms lightly touch the floor, and pressing them upward until your arms are fully extended.
- Maintain Glute Bridge: Throughout the exercise, your hips should remain elevated in the glute bridge position.
By following these technique guidelines, you can perform the Dumbbell Glute Bridge Floor Press effectively, targeting both your upper and lower body for a full-body workout.
Benefits
The Dumbbell Glute Bridge Floor Press offers a unique set of benefits, making it a valuable addition to your workout routine. Here are some of the key advantages:
Full-Body Engagement
One of the standout benefits of this exercise is its ability to engage multiple muscle groups simultaneously, providing a comprehensive full-body workout. These include:
- Lower Body: The glute bridge component targets the glutes, hamstrings, and lower back, helping to develop strength and power in the posterior chain.
- Upper Body: The dumbbell floor press engages the chest, shoulders, and triceps, contributing to upper body strength and muscle development.
- Core: Throughout the exercise, the core muscles are actively engaged to stabilize the body in the bridge position, adding a significant core-strengthening element.
Time Efficiency
Combining two exercises into one makes the Dumbbell Glute Bridge Floor Press a time-efficient choice for those looking to maximize their workout in a shorter period. Instead of separately targeting the lower and upper body, you can work on both simultaneously.
Functional Strength
The exercise’s composition promotes functional strength, as it mimics real-world activities that require both upper and lower body coordination. This can translate to improved performance in daily activities and sports.
Versatility
The Dumbbell Glute Bridge Floor Press can be adapted to different fitness levels and goals. You can adjust the weight of the dumbbells or use variations of the exercise to suit your needs, whether you’re focusing on strength, hypertrophy, or endurance.
In summary, the Dumbbell Glute Bridge Floor Press offers a multifaceted approach to strength training, targeting various muscle groups and providing time-efficient full-body workouts.
Featured image@bodybuilding by ibrakovic (freepik)
Considerations
While the Bradford Press offers a variety of benefits, it’s important to be mindful of certain considerations to perform the exercise safely and effectively:
- Proper Form: Maintaining proper form is crucial for executing the Bradford Press safely. Pay close attention to your shoulder positioning and avoid excessive arching of the back. Use controlled movements throughout the exercise.
- Warm-Up: Warm up thoroughly before the Bradford Press to address its demands on the shoulder joints. Include shoulder-specific warm-up exercises and stretches to prepare the shoulder muscles and joints.
- Weight Selection: Start with a lighter weight to become familiar with the movement and ensure you can maintain proper form. As you progress, gradually increase the weight while still prioritizing form and control.
- Shoulder Health: Individuals with shoulder issues should consult a healthcare provider before trying the Bradford Press. They can provide guidance on whether the exercise is appropriate for your specific condition.
- Range of Motion: Be mindful of your shoulder’s range of motion. Adjust the Bradford Press if discomfort arises; limit the motion or opt for alternative shoulder exercises.
- Spotter: If you’re lifting heavy weights or new to the exercise, a spotter offers added safety and assistance.
- Variations: Depending on your goals and comfort level, you can modify the Bradford Press. For example, you can use a barbell, dumbbells, or a resistance band for different challenges and variations.
- Rest and Recovery: Allow your shoulder muscles proper time for rest and recovery between Bradford Press sessions. Overtraining can increase the risk of injury, so incorporate adequate rest into your workout routine.
6. Bradford Press (Golden Era Body Exercises)
The Bradford Press is a unique shoulder exercise that was popularized during the Golden Era of bodybuilding. Unlike traditional overhead presses that focus on a single, upward push, the Bradford Press adds a dynamic element by alternating the barbell’s position in front of and behind the head. This constant tension and movement pattern make it an excellent exercise for building deltoid strength and size.
Technique
The Bradford Press is a dynamic shoulder exercise that involves alternating between a front press and a behind-the-neck press. Proper technique is essential to perform this exercise effectively and safely. Here’s a step-by-step guide on how to execute the Bradford Press correctly:
Setup
- Barbell Placement: Begin by setting up a barbell on a squat rack or a suitable stand at chest height. Make sure the bar is securely positioned.
- Grip: Stand facing the barbell with your feet shoulder-width apart. Reach up and grip the bar with your hands slightly wider than shoulder-width apart, palms facing forward. This is the starting position.
Front Press
- Engage Core: Tighten your core to stabilize your torso and maintain a neutral spine throughout the exercise.
- Press Up: Lift the barbell off the rack and push it upward in a controlled manner until your arms are fully extended, but not locked out. This is the starting position for the front press.
- Lower: Slowly lower the barbell back to your chest while maintaining control. Keep your elbows pointed slightly forward during this phase.
Behind-the-Neck Press
- Transition: After completing a front press repetition, shift your body slightly forward and allow the barbell to move behind your head.
- Positioning: As the barbell moves behind your head, bend your elbows and keep them pointed outward, not directly behind you.
- Press Up (Behind-the-Neck): Push the barbell upward again, this time behind your neck, until your arms are fully extended but not locked out.
- Return: Lower the barbell back down behind your neck, maintaining control, until it’s in the starting position for the behind-the-neck press.
Alternating Repetitions
- Continue Alternating: Alternate between front presses and behind-the-neck presses for your desired number of repetitions.
- Smooth Transitions: Focus on smooth transitions between the front and behind-the-neck presses to maintain a consistent rhythm.
Key Points (Golden Era Body Exercises)
- Breathing: Inhale as you lower the barbell and exhale as you press it upward. Maintain a consistent breathing pattern throughout the exercise.
- Controlled Movements: Ensure that the movements are controlled and deliberate, especially during the transition between front and behind-the-neck presses.
- Torso Position: Keep your core engaged to stabilize your torso and prevent excessive arching of the back. Avoid leaning backward or forward excessively during the presses.
- Elbow Position: Be mindful of the position of your elbows. They should point slightly forward during front presses and outward (not directly behind you) during behind-the-neck presses.
- Range of Motion: Use a full range of motion for each press, lowering the barbell to chest level during front presses and behind your neck during behind-the-neck presses.
By following these technique guidelines, you can perform the Bradford Press effectively, targeting multiple shoulder muscle groups and achieving a well-rounded shoulder workout.
Benefits
The Bradford Press is a versatile shoulder exercise that offers a range of benefits for individuals looking to develop shoulder strength and stability. Here are some of the key advantages:
Comprehensive Shoulder Development
The Bradford Press engages multiple shoulder muscles, including the anterior (front), lateral (side), and posterior (rear) deltoids. This comprehensive activation allows for well-rounded shoulder development, promoting balanced muscle growth and strength in the entire shoulder girdle.
Improved Shoulder Stability
The alternating press and pull phases of the Bradford Press challenge shoulder stability and coordination. This exercise can help strengthen the stabilizing muscles around the shoulder joint, reducing the risk of injuries, such as impingements or rotator cuff strains.
Increased Range of Motion
The Bradford Press requires the shoulders to move through a full range of motion, from a front press to a behind-the-neck press. This can help improve shoulder flexibility and mobility, benefiting athletes and individuals who need a broad range of shoulder movement in their activities.
Enhanced Muscle Imbalance Correction
By engaging the shoulders in multiple planes of motion, the Bradford Press can help correct muscle imbalances in the shoulder complex. This is particularly beneficial for individuals who may have developed imbalances from overtraining certain shoulder muscles.
Functional Strength
The alternating nature of the exercise mimics real-world activities that require lifting and reaching in different directions. This makes the Bradford Press a functional exercise that can improve overall shoulder strength and performance in daily tasks and sports.
Variability
The Bradford Press can be adapted to suit different fitness levels and goals. You can adjust the weight of the barbell, vary the speed of the movement, or modify the range of motion to make the exercise more or less challenging.
In summary, the Bradford Press is a dynamic shoulder exercise that provides a range of benefits, from balanced shoulder development and improved stability to increased range of motion and functional strength.
Considerations
While the Dumbbell Glute Bridge Floor Press is a valuable exercise, it’s important to consider certain factors to perform it safely and effectively:
- Proper Form: Maintaining proper form is crucial for the Dumbbell Glute Bridge Floor Press. Maintain lifted hips in the glute bridge and stabilize your upper body during the dumbbell press. Avoid excessive arching of the lower back.
- Warm-Up: Adequate warm-up is crucial before attempting the exercise due to its demands on both upper and lower body. Include dynamic stretches and lighter exercises to prepare the glutes, chest, and shoulders for the movement.
- Weight Selection: Start with a lighter weight to become familiar with the exercise and ensure you can maintain proper form. As you progress, gradually increase the weight while still prioritizing form and control.
- Shoulder Health: Exercise caution and consult a healthcare provider or physical therapist if you have shoulder issues before attempting this exercise. They can provide guidance on whether the exercise is appropriate for your specific condition.
- Range of Motion: Be mindful of your shoulder’s range of motion, especially during the dumbbell press component. If you experience discomfort or pain when pressing the dumbbells, consider limiting the range of motion or opting for alternative shoulder exercises.
- Rest and Recovery: Allow your shoulder muscles and glutes proper time for rest and recovery between Dumbbell Glute Bridge Floor Press sessions. Overtraining can increase the risk of injury, so incorporate adequate rest into your workout routine.
- Variations: Depending on your goals and comfort level, you can modify the exercise. For example, you can use a stability ball or bench to perform the glute bridge component, or you can choose to perform the exercise with one dumbbell at a time.
Overview (Golden Era Body Exercises)
The Golden Era of bodybuilding was not just a time of aesthetic physiques and legendary athletes; it was also an era of innovation and timeless training techniques. The exercises we’ve explored—Jefferson Deadlift, Cross Bench Pullover, Lying Crossbody Dumbbell Triceps Extension, Sissy Squats, Dumbbell Glute Bridge Floor Press, and Bradford Press—each offer unique benefits and challenges that make them valuable additions to any fitness regimen.
Whether you’re a seasoned athlete looking to diversify your training or a fitness enthusiast eager to try something new, incorporating these classic exercises into your routine can provide both physical and historical enrichment. They serve as a reminder that while trends in fitness may come and go, the principles of hard work, innovation, and dedication to the craft remain constant.
As we continue to push the boundaries of physical fitness, let’s not forget the foundational exercises that have stood the test of time. Here’s to the Golden Era, an age that continues to inspire us to reach for new heights in physical fitness.
Note: Always consult a healthcare provider or certified fitness professional before starting any new exercise program.
References:
- Schwarzenegger, Arnold. “The New Encyclopedia of Modern Bodybuilding.” Simon & Schuster, 1998.
- “The Jefferson Deadlift: Old-School Strength Training.” Strength and Health Magazine, 1962.
- “Biomechanics of the Jefferson Deadlift.” Journal of Strength and Conditioning Research, 2010.
- “Cross Bench Pullovers: An Old-School Classic.” Iron Man Magazine, 1975.
- “The Anatomy of the Pullover.” Journal of Sports Science, 1989.
- “Targeting the Triceps: A Biomechanical Approach.” Journal of Applied Physiology, 1995.
- “Shoulder Stability and the Lying Crossbody Dumbbell Triceps Extension.” Strength and Conditioning Journal, 2002.
- “Sissy Squats: The Forgotten Quadriceps Exercise.” Muscle & Fitness, 1980.
- “Knee Health and Sissy Squats: A Clinical Perspective.” Journal of Orthopedic Research, 1998.
- “The Dumbbell Glute Bridge Floor Press: A Compound Movement.” Journal of Strength and Conditioning Research, 2015.
- “Hip Drive and Upper Body Strength: A Synergistic Approach.” Journal of Sports Medicine, 2017.
- “The Bradford Press: A Forgotten Shoulder Builder.” Flex Magazine, 1990.
- “Exercise Prescription: A Comprehensive Guide.” American College of Sports Medicine, 2018.
- Featured Image@ Freepik (com)
- Featured stream@ Freepik, Youtube (com)


