
Building size and strength in your legs is a fundamental aspect of any well-rounded fitness routine. Strong and powerful legs not only enhance athletic performance but also contribute to overall functional fitness and aesthetic appeal. Whether you’re an athlete, a bodybuilder, or just someone looking to improve their lower body strength, incorporating the right leg (Power Building Guide) exercises into your training regimen is crucial.
In this comprehensive article, we will explore the 20 best leg exercises designed to help you achieve size and strength gains. These exercises target various muscle groups within the legs, including the quadriceps, hamstrings, glutes, and calves. We’ll cover both compound and isolation movements, as well as bodyweight exercises and weighted variations. Remember, consistency and proper form are key to achieving your leg training goals, so always prioritize safety and technique.
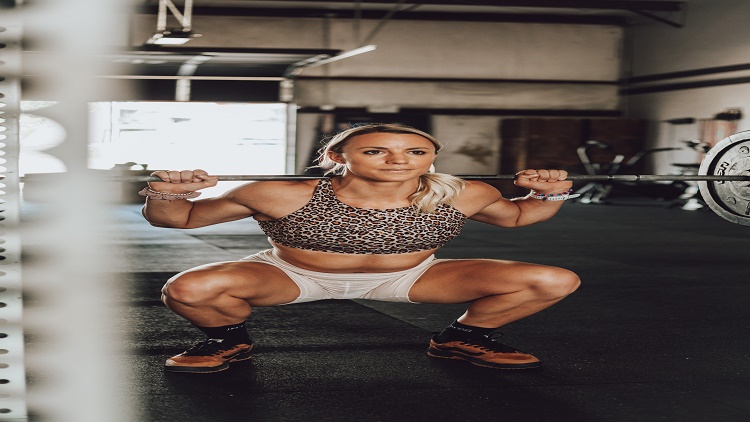
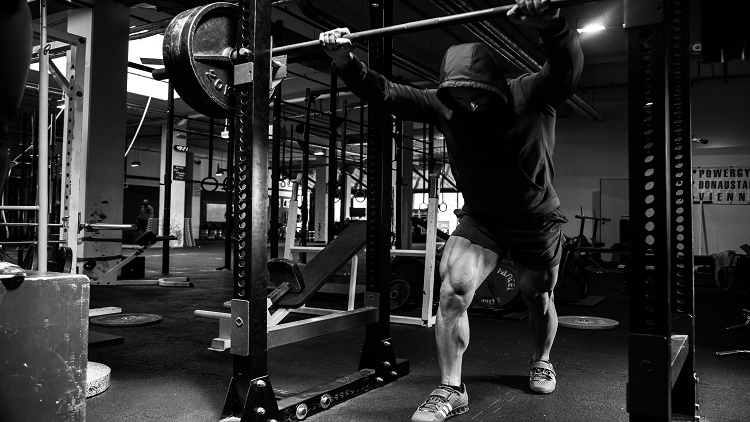
1. Barbell Back Squat
The barbell back squat is a fundamental compound exercise performed in strength training and bodybuilding. It primarily targets the lower body muscles, including the quadriceps, hamstrings, glutes, and lower back, but it also engages the core and various stabilizing muscles throughout the body.
Here’s how to perform the barbell back squat:
1. Setup:
- Begin by placing a barbell on a squat rack at about chest height.
- Step under the bar, positioning it on your upper back and across your trapezius muscles. Ensure the barbell is stable and comfortable on your back.
- Grip the bar with your hands slightly wider than shoulder-width apart, elbows pointed downward.
2. Positioning:
- Step back from the rack, clearing the supports, and position your feet shoulder-width apart or slightly wider.
- Point your toes slightly outward to allow for a more natural movement.
3. Descend:
- Initiate the movement by bending at your hips and knees simultaneously.
- Lower your body as if sitting back on an imaginary chair.
- Keep your back straight, chest up, and maintain a neutral spine throughout the movement.
- Go as deep as you can comfortably manage without compromising your form. Ideally, your thighs should be parallel to the ground or slightly below.
4. Ascent:
- Push through your heels and engage your leg muscles to drive the weight back up.
- Keep your chest up and maintain a straight back throughout the entire ascent.
- Exhale as you push the weight back up to the starting position.
5. Rack the bar:
- Once you’ve completed your desired number of repetitions, walk back to the rack.
- Carefully re-rack the bar on the supports.
Tips for a safe and effective barbell back squat:
- Warm up adequately before attempting heavy squats.
- Use a weight that allows you to maintain proper form throughout the entire set.
- Engage your core to stabilize your spine during the movement.
- Keep your knees aligned with your toes; avoid letting them collapse inward.
- Do not round your back or lean too far forward during the descent.
- As you become more proficient, consider gradually increasing the weight to continue challenging your muscles.
Remember, if you’re new to squatting or weightlifting, it’s a good idea to work with a fitness professional to ensure you’re performing the exercise correctly and safely.
2. Deadlift
The deadlift is another essential compound exercise in strength training and powerlifting. It targets multiple muscle groups, including the lower back, glutes, hamstrings, quadriceps, traps, and forearms. Deadlifts are highly effective for building overall strength, improving posture, and developing functional strength for everyday activities.
Here’s how to perform the conventional barbell deadlift:
1. Setup:
- Begin by standing with your feet hip-width apart or slightly narrower.
- Position the barbell over the middle of your feet, so it’s close to your shins.
- Bend at your hips and knees to lower your body and grip the barbell with both hands. Use an overhand grip or a mixed grip (one hand overhand, the other underhand) for better grip strength.
2. Positioning:
- Your grip on the bar should be shoulder-width apart or slightly wider.
- Keep your back straight, chest up, and shoulders pulled back throughout the entire movement.
- Engage your core to stabilize your spine.
3. Lift:
- Push through your heels and stand up by extending your hips and knees simultaneously.
- As you lift, keep the barbell close to your body and maintain a straight bar path.
- Fully extend your hips and stand tall at the top of the movement, squeezing your glutes at the lockout position.
4. Lowering the weight:
- To lower the barbell, hinge at your hips and slowly bend your knees while keeping the barbell close to your body.
- Lower the weight with control back to the starting position.
Tips for a safe and effective deadlift:
- Warm up adequately before attempting heavy deadlifts.
- Start with a light weight to practice proper form before adding more weight.
- Engage your lats by imagining pulling the barbell back toward your body as you lift.
- Avoid rounding your back or letting it excessively arch during the lift.
- Keep the barbell close to your shins throughout the movement to maintain balance and reduce strain on your lower back.
- Exhale as you lift the weight and inhale as you lower it.
- If you’re a beginner, consider seeking guidance from a fitness professional to learn the correct form and technique.
As with any exercise, it’s essential to listen to your body and avoid lifting more weight than you can handle with proper form. Deadlifts can be physically demanding, so take care to prevent injury by using proper technique and gradually increasing the weight as you become more experienced and stronger.
3. Bulgarian Split Squat
The Bulgarian split squat, also known as the rear-foot elevated split squat, is a unilateral lower body exercise that targets the quadriceps, hamstrings, glutes, and hip stabilizer muscles. It is an effective exercise for building leg strength, improving balance, and addressing any muscle imbalances between the left and right sides of the body.
Here’s how to perform the Bulgarian split squat:
1. Setup:
- Find a bench, elevated platform, or step that is about knee height.
- Stand facing away from the bench and take a step forward with one foot, positioning it a comfortable distance away from the bench. The top of your foot should be resting on the bench behind you.
2. Positioning:
- Assume a split stance with one foot in front and the other foot elevated behind you on the bench.
- The front foot should be far enough from the bench that, when you lower your body, the knee of the front leg stays directly above the ankle (forming a 90-degree angle).
- Keep your chest up, shoulders back, and engage your core for stability.
3. Descend:
- Lower your body by bending your front knee and hip, lowering yourself straight down.
- The back knee should be pointing toward the floor as you descend, and the front knee should not go past your toes.
- Go as low as you comfortably can while maintaining proper form and balance.
4. Ascent:
- Push through the heel of the front foot to return to the starting position.
- Keep your body upright and avoid leaning too far forward during the ascent.
- Repeat for the desired number of repetitions on one leg before switching to the other leg.
Tips for a safe and effective Bulgarian split squat:
- Maintain control throughout the movement, especially when lowering your body.
- Keep your upper body upright and avoid excessive leaning or rounding of the back.
- Focus on engaging the muscles of the front leg to push yourself back up.
- Use your arms for balance if needed, placing them on your hips or extending them in front of you.
- Start with bodyweight or light dumbbells, and gradually increase the resistance as you become more comfortable with the movement.
- Perform the same number of repetitions on each leg to maintain balance and symmetry in your training.
As with any exercise, it’s essential to perform the Bulgarian split squat with proper form to avoid injury and get the most out of the exercise. If you have any concerns or pre-existing conditions, it’s a good idea to consult with a fitness professional or healthcare provider before incorporating new exercises into your routine.
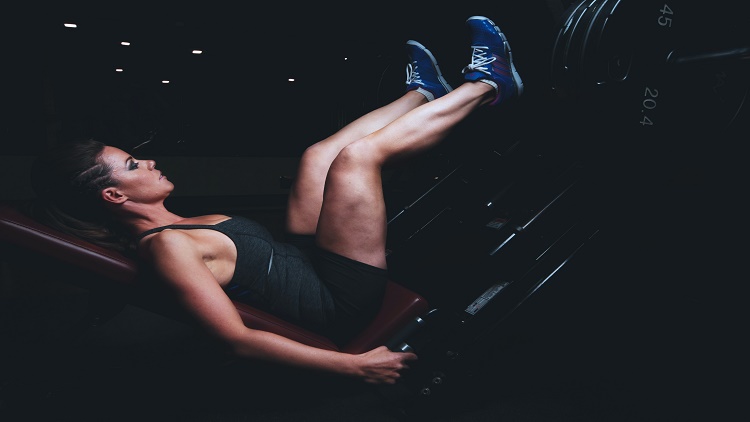
4. Leg Press (Power Building Guide)
The leg press is a popular strength training exercise that primarily targets the quadriceps, hamstrings, and glutes. It is performed using a leg press machine, which provides a guided range of motion and allows you to lift a significant amount of weight safely. The leg press is an excellent compound exercise for building lower body strength and muscle mass.
Here’s how to perform the leg press:
1. Setup:
- Adjust the seat of the leg press machine so that your knees are at a 90-degree angle when your feet are placed flat on the footplate.
- Place your feet shoulder-width apart on the footplate, with your toes pointed slightly outward.
- Your knees should be in line with your feet, and your back should be comfortably against the backrest.
2. Positioning:
- Hold onto the handles on the sides of the seat for stability and support.
- Take a deep breath and engage your core muscles.
3. Descend:
- Lower the weight by bending your knees and hips until your thighs are parallel to the footplate or slightly lower.
- Keep your back against the backrest throughout the movement and avoid rounding your lower back.
4. Ascent:
- Push through your heels and extend your knees and hips to return to the starting position.
- Exhale as you push the weight back up.
Tips for a safe and effective leg press:
- Start with a light weight and gradually increase the resistance as you become more comfortable with the exercise.
- Focus on maintaining a controlled and smooth movement throughout the entire range of motion.
- Avoid locking out your knees at the top of the movement to keep tension on the muscles and reduce the risk of injury.
- Keep your knees in line with your feet and avoid letting them collapse inward.
- Do not let your lower back round during the movement; keep it flat against the backrest.
- Avoid lifting your hips off the seat or using excessive momentum to move the weight.
The leg press can be an excellent addition to your lower body workout routine, especially if you want to target your quadriceps, hamstrings, and glutes while minimizing the stress on your lower back. However, like any exercise, it’s essential to use proper form and appropriate weight for your fitness level to prevent injury and get the best results. If you’re unsure about using the leg press machine or any other exercise, consider consulting a fitness professional for guidance.
5. Romanian Deadlift (RDL)
The Romanian Deadlift (RDL) is a popular and effective compound exercise that primarily targets the muscles of the posterior chain, including the hamstrings, glutes, and lower back. It also engages the core, upper back, and grip strength, making it a valuable exercise for building strength and improving overall athletic performance.
Here’s how to perform the Romanian Deadlift (RDL):
1. Setup:
- Begin by standing with your feet hip-width apart or slightly narrower.
- Hold a barbell or dumbbells in front of your thighs with an overhand grip (palms facing you) or a mixed grip (one hand overhand, the other underhand).
- Your hands should be shoulder-width apart or slightly wider.
2. Positioning:
- Engage your core and keep your chest up as you slightly arch your lower back.
- Maintain a neutral spine throughout the exercise, avoiding excessive rounding or arching of the back.
3. Descent:
- Initiate the movement by pushing your hips back while maintaining a slight bend in your knees.
- Lower the weight by hinging at your hips and allowing the barbell or dumbbells to travel down the front of your thighs.
- Keep the barbell close to your body as you lower it toward the ground.
4. Stretch and Return:
- Lower the weight until you feel a comfortable stretch in your hamstrings. Ideally, the barbell should reach about mid-shin level.
- At the bottom of the movement, your hips should be pushed back, and your chest should be pointed forward.
- To return to the starting position, engage your hamstrings and glutes as you push your hips forward.
- Keep the weight close to your body and maintain control throughout the ascent.
5. Full Extension:
- Stand tall at the top of the movement, squeezing your glutes at the lockout position.
- Your hips and knees should be fully extended, and your shoulders should be pulled back.
Tips for a safe and effective Romanian Deadlift (RDL):
- Start with a light weight and focus on mastering the form before adding more weight.
- Maintain a neutral spine throughout the exercise, avoiding excessive rounding or arching of the back.
- Keep the movement slow and controlled, especially during the descent.
- Avoid using your lower back to lift the weight; the emphasis should be on the hip hinge and engagement of the posterior chain muscles.
- Keep the barbell or dumbbells close to your body throughout the entire movement.
- Exhale as you lift the weight and inhale as you lower it.
The Romanian Deadlift is a valuable exercise for developing strength and muscle mass in the posterior chain. As with any exercise, using proper form and appropriate weight for your fitness level are crucial for safety and effectiveness. If you’re new to the Romanian Deadlift or weightlifting in general, consider seeking guidance from a fitness professional to learn the correct technique and avoid injury.
6. Goblet Squat (Leg Power Building Guide)
The goblet squat is a compound exercise that targets the lower body, particularly the quadriceps, hamstrings, glutes, and core muscles. It is a variation of the traditional squat and is named after the way you hold the weight, similar to how you would hold a goblet or a cup. The goblet squat is a popular exercise for beginners and experienced lifters alike, as it helps improve squatting mechanics and overall lower body strength.
Here’s how to perform the goblet squat:
1. Setup:
- Begin by holding a dumbbell, kettlebell, or any weight plate vertically close to your chest with both hands.
- Stand with your feet slightly wider than shoulder-width apart, and point your toes slightly outward.
2. Positioning:
- Keep your chest up, shoulders back, and engage your core for stability.
- Your elbows should be pointing down, and the weight should be close to your body throughout the movement.
3. Descend: (Leg Power Building Guide)
- Initiate the squat by pushing your hips back and bending your knees simultaneously.
- Lower your body down as if you are sitting back on an imaginary chair.
- Keep your back straight and maintain a neutral spine as you squat down.
4. Ascent:
- Push through your heels and engage your leg muscles to stand back up.
- Keep your chest up and your weight balanced over your feet throughout the ascent.
5. Full Extension:
- Stand tall at the top of the movement, fully extending your hips and knees.
- Squeeze your glutes at the top of the squat.
Tips for a safe and effective goblet squat:
- Start with a light weight to practice proper form before adding more resistance.
- Keep the weight close to your chest throughout the exercise to maintain stability.
- Focus on pushing your hips back and maintaining an upright chest during the squat.
- Avoid rounding your back or letting your knees collapse inward.
- Perform the movement in a controlled manner, both during the descent and ascent.
- Breathe out as you push up from the squat and breathe in as you descend.
- If using a dumbbell or kettlebell, ensure that you have a secure grip to prevent dropping the weight.
The goblet squat is a versatile exercise that can be included in your lower body workout routine or used as a warm-up exercise to activate the lower body muscles before more challenging lifts. It’s particularly useful for those learning how to squat correctly or for anyone looking to add variety to their leg workouts. As always, focus on maintaining proper form to get the most benefit from the exercise and to reduce the risk of injury. If you’re unsure about the goblet squat or any other exercise, consider seeking guidance from a fitness professional.
7. Box Jump (Leg Power Building Guide)
The box jump is a plyometric exercise that focuses on explosive lower body power and strength. It involves jumping onto a box or platform from a standing position. Box jumps are commonly used in various sports and fitness training programs to improve athleticism, agility, and vertical jumping ability.
Here’s how to perform a box jump:
1. Setup:
- Find a sturdy box or platform of an appropriate height. The height will depend on your fitness level and experience. Beginners may start with a lower box, while more advanced individuals can use a higher one.
- Stand facing the box, about a foot or so away, with your feet shoulder-width apart.
2. Positioning:
- Keep your chest up, shoulders back, and engage your core for stability.
- Your arms can be positioned by your sides or bent at the elbows, ready to swing for added momentum.
3. Jump:
- Bend your knees and swing your arms backward to generate power.
- Explosively jump off both feet, aiming to land softly and safely on top of the box.
- As you jump, tuck your knees toward your chest to clear the height of the box.
4. Landing:
- Absorb the impact of the landing by bending your knees slightly and using your leg muscles to cushion the landing.
- Land with both feet on the box, ensuring you have a stable footing.
5. Step down or jump down:
- To return to the starting position, you can step down one foot at a time or perform a controlled jump down, landing with both feet on the ground.
- If you choose to jump down, make sure the box is not too high, and you can safely absorb the landing impact.
Tips for a safe and effective box jump:
- Start with a lower box height if you are new to box jumps and gradually increase the height as you become more confident and proficient.
- Focus on proper form and landing softly to reduce the impact on your joints.
- Use your arms to generate momentum and power for the jump.
- Keep your knees aligned with your toes during the jump to prevent injury.
- Make sure the box or platform you’re using is stable and can support your body weight.
- Consider performing box jumps as part of a dynamic warm-up or at the beginning of your workout when your muscles are fresh.
Box jumps are an excellent addition to your training routine to improve lower body explosiveness, agility, and coordination. However, they are considered an advanced exercise and may not be suitable for everyone, especially those with knee or joint issues. If you’re unsure about adding box jumps to your routine, consult with a fitness professional to determine if they are appropriate for your fitness level and goals.
8. Walking Lunges (Leg Power Building Guide)
Walking lunges are a fantastic lower body exercise that targets the quadriceps, hamstrings, glutes, and calves. They also engage the core for stability and improve balance and coordination. Walking lunges are a versatile exercise that can be performed anywhere with enough space, making them a popular choice for strength training workouts.
Here’s how to perform walking lunges:
1. Setup:
- Stand tall with your feet together and your hands on your hips or down by your sides.
- Keep your shoulders back, chest up, and engage your core.
2. Step forward:
- Take a big step forward with one leg, ensuring that your front knee is directly above your ankle and forms a 90-degree angle.
- Lower your body by bending both knees until your back knee almost touches the ground or hovers slightly above it.
3. Lunge:
- Keep your weight on the heel of the front foot as you lower yourself into the lunge position.
- Your back knee should be pointing toward the floor, and your front knee should not go past your toes.
- Maintain an upright torso with your chest up and shoulders back throughout the lunge.
4. Push back:
- Push through the heel of the front foot to return to the starting position.
- Bring your back foot forward to meet your front foot.
5. Repeat on the other leg:
- Step forward with the opposite leg and repeat the lunge movement.
- Continue alternating legs as you walk forward, performing lunges with each step.
Tips for safe and effective walking lunges:
- Use a controlled and steady pace to maintain balance and stability.
- Keep your core engaged to support your lower back during the exercise.
- Avoid letting your front knee collapse inward; it should track in line with your toes.
- Take long enough strides to create a challenging lunge without overstriding and compromising your form.
- Land softly on your front foot and keep your weight distributed evenly through the heel to minimize stress on the knee joint.
- Maintain an upright posture throughout the exercise to maximize the engagement of the lower body muscles.
Walking lunges are a great addition to leg day workouts or full-body routines. You can perform them with bodyweight only, or you can add dumbbells or other weighted equipment for added resistance. They offer functional benefits by mimicking natural walking movements and can help improve overall lower body strength, stability, and mobility. If you’re new to lunges or have any concerns about your form, consider seeking guidance from a fitness professional to ensure you’re performing the exercise correctly and safely.
9. Pistol Squat
The pistol squat is an advanced bodyweight exercise that challenges your leg strength, balance, and mobility. It is a unilateral movement, which means it works one leg at a time, making it an excellent exercise for improving leg strength and addressing any muscle imbalances. The pistol squat requires significant lower body strength, flexibility, and stability.
Here’s how to perform the pistol squat:
1. Setup:
- Begin by standing on one leg with your foot flat on the ground.
- Extend your other leg straight out in front of you, keeping it parallel to the ground.
- Position your arms straight out in front of you for balance.
2. Descend:
- Initiate the movement by pushing your hips back and bending your standing leg’s knee.
- Lower your body down as far as you can while maintaining balance and control.
- Keep your back straight and your chest up throughout the movement.
3. Ascent:
- Push through the heel of your standing foot to return to the starting position.
- As you rise, keep your other leg extended in front of you.
- Complete the repetition by standing tall with your knee and hip fully extended.
Tips for a safe and effective pistol squat:
- Start by practicing with partial range of motion or assisted versions of the pistol squat. For example, you can hold onto a sturdy object, like a TRX suspension trainer or a doorknob, to help with balance and stability.
- Focus on maintaining proper alignment of your knee and ankle during the movement. Your knee should track in line with your toes, and your heel should stay flat on the ground.
- Engage your core and keep your body upright to prevent leaning too far forward during the squat.
- Work on ankle and hip mobility through various stretches and exercises to help you achieve a full range of motion.
- As you become more proficient, try to increase the depth of the squat gradually until you can perform a full pistol squat with your hip crease below your knee.
The pistol squat is a challenging exercise that requires patience and practice. It’s essential to build strength and mobility in your legs gradually. Don’t get discouraged if you can’t perform a full pistol squat right away; it takes time to develop the necessary strength and balance. If you’re unsure about attempting pistol squats or need guidance on how to progress safely, consider working with a fitness professional who can help you with proper form and suitable progressions.
10. Step-Up
The step-up is a simple yet effective lower body exercise that targets the quadriceps, hamstrings, glutes, and calves. It also engages the core and improves balance and stability. Step-ups are a functional exercise that mimics everyday activities like climbing stairs or stepping up onto a raised platform.
Here’s how to perform a step-up: (Leg Power Building Guide)
1. Setup:
- Stand facing a sturdy elevated surface, such as a step, box, or bench. The height of the surface should be challenging but manageable for your fitness level.
- Position your feet shoulder-width apart.
2. Step Up:
- Step onto the elevated surface with one foot, pushing through your heel and engaging your leg muscles.
- Use the muscles of the front leg to lift your body up onto the platform.
- Make sure your entire foot is securely on the step.
3. Full Extension:
- Stand tall on the elevated surface, fully extending your hip and knee of the front leg.
- Keep your chest up, shoulders back, and core engaged for stability.
4. Step Down:
- Carefully step down from the elevated surface with the same foot, returning it to the starting position on the ground.
- Maintain control throughout the descent.
5. Repeat on the other leg:
- Perform the step-up exercise with the opposite leg, stepping onto the elevated surface and then stepping down.
Tips for a safe and effective step-up:
- Start with a lower step height if you’re new to the exercise or gradually increase the height as you become more comfortable.
- Focus on proper form and maintain a steady pace throughout the exercise.
- Keep your knee aligned with your toes during the step-up to prevent any excess stress on the knee joint.
- Use your arms for balance by letting them swing naturally or placing your hands on your hips.
- To challenge your muscles further, you can hold dumbbells in each hand or wear a weighted vest during the exercise.
- Perform the same number of repetitions on each leg to maintain balance and symmetry.
The step-up is a versatile exercise that can be easily modified to suit different fitness levels and goals. It can be incorporated into your lower body workout routine or used as a warm-up exercise to activate the leg muscles before more intense movements. If you have any concerns about performing step-ups or other exercises, consider consulting a fitness professional to ensure proper form and technique.
11. Hamstring Curl (Leg Power Building Guide)
The hamstring curl, also known as the leg curl, is an isolation exercise that targets the muscles of the hamstrings, located on the back of your thighs. It’s an effective way to strengthen and tone the hamstrings, which play a crucial role in knee flexion and hip extension.
There are two primary variations of the hamstring curl: the lying leg curl and the seated leg curl. Both versions target the hamstrings but have slightly different setups.
1. Lying Leg Curl:
Setup:
- Lie face down on a leg curl machine, positioning your legs straight behind you.
- The padded lever of the machine should rest just above your heels, near your Achilles tendon.
- Adjust the machine’s lever to fit your leg length, ensuring it’s secure and comfortable.
- Place your hands on the machine’s handles or hold onto the bench for stability.
Execution:
- While exhaling, bend your knees and curl your legs upward, bringing the padded lever toward your glutes.
- Squeeze your hamstrings at the top of the movement for a brief moment.
- Inhale as you slowly lower the lever back to the starting position with control.
2. Seated Leg Curl: (Leg Power Building Guide)
Setup:
- Sit on a leg curl machine with your back against the backrest and your legs extended in front of you.
- Adjust the machine’s lever to fit your leg length, ensuring it’s secure and comfortable.
- Place your hands on the machine’s handles or hold onto the sides of the seat for support.
Execution:
- While exhaling, bend your knees and curl your lower legs upward, pulling the padded lever toward your glutes.
- Squeeze your hamstrings at the top of the movement for a brief moment.
- Inhale as you slowly extend your legs back to the starting position with control.
Tips for a safe and effective hamstring curl:
- Perform the exercise in a slow and controlled manner to avoid swinging or using momentum.
- Keep your upper body stable throughout the movement, especially your back and hips.
- Focus on feeling the contraction in your hamstrings during the curling phase.
- Do not use weights that are too heavy, as this can compromise your form and increase the risk of injury.
- As with any exercise, warm up properly before starting, and stretch your hamstrings after the workout to maintain flexibility.
The hamstring curl is an excellent exercise for targeting and strengthening the hamstrings. However, it’s essential to combine it with a well-rounded leg workout routine that includes exercises for other muscle groups, such as the quadriceps and glutes, to achieve balanced lower body strength and avoid any muscle imbalances. If you’re unsure how to incorporate the hamstring curl or any other exercises into your fitness routine, consider seeking guidance from a fitness professional.
12. Calf Raises
Calf raises are a simple yet effective exercise that targets the calf muscles, specifically the gastrocnemius and soleus muscles. They help strengthen and tone the calves, which are essential for activities like walking, running, and jumping. Calf raises can be done with bodyweight or added resistance, making them a versatile exercise to incorporate into your lower body workout routine.
Here’s how to perform calf raises:
1. Stand with your feet shoulder-width apart or slightly narrower, keeping your toes pointing forward.
2. Bodyweight Calf Raise:
Execution:
- Slowly rise up onto the balls of your feet, lifting your heels off the ground.
- Squeeze your calf muscles at the top of the movement.
- Hold the top position for a brief moment.
- Lower your heels back down to the starting position in a controlled manner.
3. Weighted Calf Raise: (Leg Power Building Guide)
Execution:
- Hold a dumbbell in each hand or use a barbell placed across your shoulders.
- Follow the same steps as the bodyweight calf raise, rising up onto the balls of your feet, squeezing your calves, and then lowering your heels back down.
Tips for a safe and effective calf raise:
- Keep your movements slow and controlled throughout the exercise.
- Focus on feeling the contraction in your calf muscles as you rise up onto your toes.
- Keep your upper body stable, avoiding excessive swaying or leaning.
- Perform the calf raises on a stable surface to prevent any balance issues.
- To target different parts of the calf muscles, you can perform calf raises with your toes pointed straight ahead, inward (inverted), or outward (everted).
- Consider performing calf raises both with straight legs and with slightly bent knees to target different muscle fibers.
- Incorporate different variations, such as single-leg calf raises, to add variety to your calf training.
Calf raises are relatively easy to perform, and you can do them almost anywhere. They are a great addition to your lower body workout routine and can be done at the end of a leg workout or as a standalone exercise. Gradually increase the resistance over time to continue challenging your calf muscles and promoting growth and strength. As with any exercise, if you experience any pain or discomfort during calf raises, it’s essential to consult with a fitness professional or healthcare provider to ensure you are performing the exercise correctly and safely.
13. Glute Bridge (Leg Power Building Guide)
The glute bridge is a highly effective bodyweight exercise that targets the gluteal muscles (glutes) and helps strengthen the lower back, hamstrings, and core. It’s a great exercise for improving glute activation, hip mobility, and overall posterior chain strength. The glute bridge can be done by individuals of various fitness levels, making it suitable for beginners and experienced exercisers alike.
Here’s how to perform the glute bridge:
1. Setup:
- Lie on your back with your knees bent and feet flat on the floor, hip-width apart.
- Place your arms by your sides, with your palms facing down.
2. Execution:
- Engage your core muscles and press through your heels to lift your hips off the ground.
- Keep your back and shoulders on the floor while your hips rise.
- Squeeze your glutes at the top of the movement, making sure your body forms a straight line from your shoulders to your knees.
- Hold the bridge position for a brief moment, focusing on activating your glutes.
3. Lowering down:
- Lower your hips back down to the starting position in a controlled manner.
4. Repeat:
- Perform the desired number of repetitions or hold the bridge position for a specific amount of time.
Tips for a safe and effective glute bridge:
- Keep your feet firmly planted on the ground throughout the movement, with your weight evenly distributed across both feet.
- Avoid pushing your hips too high or arching your lower back excessively during the bridge.
- Engage your core to stabilize your spine and prevent excessive hyperextension of your lower back.
- Focus on using your glutes to lift your hips, rather than relying solely on your lower back or hamstrings.
- Breathe naturally throughout the exercise, inhaling as you lower your hips and exhaling as you lift them.
- To increase the challenge, you can perform single-leg glute bridges by lifting one foot off the ground while keeping the other foot flat on the floor.
The glute bridge is a versatile exercise that can be incorporated into warm-up routines, lower body workouts, or glute-specific training sessions. It’s especially beneficial for individuals who spend a lot of time sitting, as it helps activate and strengthen the glutes, which can become weak from prolonged sitting. For individuals with lower back issues, the glute bridge can also serve as a gentle way to engage the glutes and core without putting excessive stress on the lumbar spine. As always, if you have any health concerns or are new to exercise, consider seeking guidance from a fitness professional to ensure proper form and technique.
14. Barbell Hip Thrust
The barbell hip thrust is a highly effective exercise that targets the glutes, hamstrings, and lower back. It’s a popular choice for building strength and muscle in the gluteal muscles, making it a staple in many lower body workout routines. The barbell hip thrust is often used by athletes, bodybuilders, and fitness enthusiasts to improve hip extension and overall posterior chain strength.
Here’s how to perform the barbell hip thrust:
1. Setup:
- Start by sitting on the ground with your back against a stable bench or elevated surface.
- Place a barbell across your lap, just above your hip bones.
- Position your feet flat on the ground, hip-width apart or slightly wider.
- Make sure your knees are bent at approximately a 90-degree angle.
2. Execution:
- Brace your core and drive through your heels to lift your hips off the ground.
- Squeeze your glutes and engage your hamstrings as you push your hips upward.
- Your body should form a straight line from your shoulders to your knees at the top of the movement.
- Hold the top position for a brief moment, focusing on the glute contraction.
3. Lowering down:
- Lower your hips back down to the starting position in a controlled manner, but do not let your glutes touch the ground.
- Maintain tension in your glutes and hamstrings throughout the entire set.
4. Repeat:
- Perform the desired number of repetitions, keeping your form and control consistent throughout the exercise.
Tips for a safe and effective barbell hip thrust:
- Place a cushion or pad over the barbell to make the exercise more comfortable on your hips.
- Keep your upper back and shoulders stable against the bench throughout the movement.
- Avoid arching your lower back excessively; instead, focus on maintaining a neutral spine.
- Ensure that your knees stay in line with your toes during the exercise.
- Use a challenging weight that allows you to perform the exercise with proper form and control.
- To increase the intensity, consider using resistance bands, placing a weight plate on your lap, or performing single-leg variations.
The barbell hip thrust is an excellent exercise for isolating and targeting the gluteal muscles. It’s especially useful for individuals who want to develop strong and shapely glutes. As with any exercise, it’s essential to perform the barbell hip thrust with proper form to avoid injury and get the most benefit. If you’re new to this exercise or strength training in general, consider seeking guidance from a fitness professional to ensure you’re performing it correctly and safely.
15. Sissy Squat (Leg Power Building Guide)
The sissy squat is an advanced bodyweight exercise that primarily targets the quadriceps and challenges your balance and stability. It’s an isolation exercise for the quads, and it’s not as commonly performed as traditional squats or lunges. The sissy squat can be an effective addition to leg workouts for those looking to build quadriceps strength and improve knee stability.
Here’s how to perform the sissy squat:
1. Setup:
- Stand with your feet shoulder-width apart and your arms hanging by your sides.
- Position your feet so that your toes are pointing forward.
2. Execution:
- Shift your weight back to your heels as you bend your knees and lower your body.
- At the same time, lean your upper body backward, moving your hips forward and keeping your back straight.
- Continue to lower your body until your knees are bent at approximately a 90-degree angle or slightly more.
- Your upper body should be leaning back, and your heels should be lifted off the ground at this point.
3. Ascent:
- Push through your toes and the balls of your feet to return to the starting position.
- Keep your back straight and your knees tracking in line with your toes.
Tips for a safe and effective sissy squat:
- The sissy squat can be demanding on the knees, so it’s crucial to have sufficient quadriceps and knee strength before attempting this exercise.
- Perform the sissy squat on a padded surface or use a cushion under your knees to minimize discomfort and pressure on the joint.
- Maintain control throughout the movement to avoid any sudden jerking or strain on the knees.
- Focus on keeping your core engaged and your upper body stable during the exercise.
- If you’re new to the sissy squat, consider using a support such as a sturdy object or a Smith machine for assistance until you become more comfortable with the movement.
Because the sissy squat places significant stress on the knees and requires good quadriceps strength and flexibility, it may not be suitable for everyone, especially those with knee issues or limitations. If you’re unsure about the sissy squat or any other exercise, it’s a good idea to consult with a fitness professional or healthcare provider before attempting it. They can provide guidance on whether the sissy squat is appropriate for your fitness level and goals and can suggest alternative exercises if needed.
16. Bulgarian Split Squat Jumps
The Bulgarian split squat jump is an advanced plyometric exercise that combines the benefits of the traditional Bulgarian split squat with explosive jumping movements. It targets the quadriceps, hamstrings, glutes, and calf muscles while also improving lower body power, stability, and balance. This exercise can be challenging and is best suited for individuals with a good foundation of strength and experience in lower body plyometrics.
Here’s how to perform the Bulgarian split squat jump:
1. Setup:
- Stand facing away from a bench or elevated platform, with your back foot resting on the bench.
- Take a step forward with your other foot, positioning it far enough away from the bench that your front knee is directly above your ankle when you lower into a lunge position.
- Keep your chest up, shoulders back, and engage your core for stability.
2. Execution:
- Lower your body into a lunge position by bending your front knee and hip, allowing your back knee to descend toward the floor.
- Explosively jump off the ground, using both legs, and switch the positions of your legs mid-air.
- Land softly in a lunge position with your opposite foot forward and your back foot on the bench.
- Immediately descend into the next rep by bending your front knee and hip to perform another explosive jump.
3. Repetitions:
- Continue performing the split squat jumps for the desired number of repetitions or time.
Tips for a safe and effective Bulgarian split squat jumps:
- Before attempting this exercise, ensure that you can perform regular Bulgarian split squats with proper form and without any discomfort or pain.
- Use a controlled motion when landing to reduce the impact on your knees and ankles.
- Land with a bent knee to absorb the landing forces and immediately descend into the next rep to maintain the flow of the exercise.
- Keep your movements explosive and powerful but maintain proper control to prevent injury.
- Start with a lower number of repetitions or time and gradually increase the intensity as you become more comfortable with the exercise.
- If you’re new to plyometric exercises or have any concerns about your ability to perform Bulgarian split squat jumps, consider consulting with a fitness professional to ensure you have the necessary strength and technique for this exercise.
Due to its high-intensity nature, the Bulgarian split squat jump is best incorporated into a well-rounded workout routine that includes other lower body strength and plyometric exercises. Be mindful of your body’s limitations and avoid pushing yourself too hard if you’re not ready for this advanced exercise. Always prioritize safety and proper form when performing any exercise.
17. Front Squat (Leg Power Building Guide)
The front squat is a popular compound exercise that primarily targets the quadriceps, while also engaging the glutes, hamstrings, core, and upper back. It is an excellent variation of the traditional back squat, and it places more emphasis on the muscles in the front of the body due to the barbell placement. Front squats also challenge your core stability, making it a valuable exercise for building overall lower body strength and athleticism.
Here’s how to perform the front squat:
1. Setup:
- Begin by setting up a barbell in a squat rack at about chest height.
- Stand facing the barbell and grip it with an overhand grip, slightly wider than shoulder-width apart.
- Lift the barbell onto your shoulders, crossing your arms in front of you and resting the bar on the front of your deltoids (shoulders).
- Elbows should be pointing forward, and your upper arms should be parallel to the ground.
- Position your feet shoulder-width apart or slightly wider, with your toes pointing slightly outward.
2. Execution:
- Take a deep breath and brace your core.
- Initiate the squat by pushing your hips back and bending your knees.
- Lower your body down, keeping your back straight and your chest up.
- Descend until your thighs are parallel to the ground or slightly below parallel, maintaining an upright torso.
3. Ascent:
- Drive through your heels and push your hips forward to stand back up.
- Keep the barbell stable on your shoulders throughout the movement.
- Fully extend your hips and knees at the top of the squat.
Tips for a safe and effective front squat: (Leg Power Building Guide)
- Keep your elbows high and pointed forward throughout the exercise to prevent the barbell from rolling forward.
- Maintain an upright torso during the front squat to keep the weight centered and balanced.
- Do not let your knees collapse inward; they should track in line with your toes.
- Start with a light weight and focus on mastering the form before adding more weight.
- Breathe in as you lower into the squat and breathe out as you stand back up.
- If you’re new to the front squat or using a barbell in this position, consider practicing with a PVC pipe or an empty bar to get used to the movement and bar placement.
- Front squats can be more challenging on your wrists and require flexibility in your wrists and shoulders. If you have difficulty with the front rack position, consider using straps or using a cross-arm grip as an alternative.
Front squats are a valuable exercise for developing lower body strength, improving mobility, and building a strong core. They can be included in your leg day routine or full-body workouts. As with any exercise, using proper form and starting with appropriate weight for your fitness level are essential for safety and effectiveness. If you’re unsure about performing front squats or any other exercise, consider seeking guidance from a fitness professional.
18. Glute-Ham Raise
The glute-ham raise, also known as the glute-ham developer (GHD) raise or the Nordic hamstring curl, is a highly effective exercise that targets the hamstrings, glutes, and lower back. It’s a challenging bodyweight movement that requires a glute-ham raise machine or a GHD bench to perform properly. The glute-ham raise is commonly used by athletes, weightlifters, and fitness enthusiasts to develop strength in the posterior chain and improve performance in various sports and activities.
Here’s how to perform the glute-ham raise:
1. Setup:
- Position yourself on the glute-ham raise machine or GHD bench with your feet anchored under the footpads and your knees resting on the knee pads.
- Your upper thighs should be in contact with the pad, and your upper body should be parallel to the floor, facing downward.
2. Execution:
- Engage your glutes and hamstrings, and lower your upper body toward the ground in a controlled manner.
- As you descend, maintain a straight line from your head to your knees.
- Continue lowering until you feel a stretch in your hamstrings or until your upper body is almost parallel to the floor.
- From the bottom position, use your hamstrings and glutes to raise your upper body back to the starting position.
3. Modification (Nordic Hamstring Curl):
- If you don’t have access to a glute-ham raise machine or GHD bench, you can perform a modified version known as the Nordic hamstring curl.
- Kneel on a soft surface with a partner holding your ankles or secure your ankles under a sturdy object (such as a barbell loaded with weight plates) to anchor your feet.
- While maintaining a straight line from your head to your knees, lower your upper body forward by bending at the hips and knees.
- When you can’t lower any further or feel a stretch in your hamstrings, engage your hamstrings to raise your upper body back to the starting position.
Tips for a safe and effective glute-ham raise:
- Start with a partial range of motion if you are new to the exercise and gradually progress to a full range of motion over time.
- Keep your core engaged throughout the movement to maintain stability.
- Perform the glute-ham raise in a controlled manner, avoiding rapid or jerky movements.
- In the Nordic hamstring curl variation, use your arms to push off the ground if you need assistance to return to the starting position.
- If you’re using a partner to hold your ankles, communicate with them about the amount of assistance you need during the movement.
- Listen to your body and stop the exercise if you feel any pain or discomfort.
The glute-ham raise is an advanced exercise that can be demanding on the hamstrings and glutes. It’s essential to ensure you have adequate hamstring strength and flexibility before attempting this exercise to avoid injury. If you’re unsure about performing the glute-ham raise or any other exercise, consider seeking guidance from a fitness professional to ensure proper form and technique.
19. Hack Squat (Leg Power Building Guide)
The hack squat is a popular lower body exercise that targets the quadriceps, hamstrings, and glutes, similar to traditional squats. It is typically performed using a hack squat machine, which provides additional support and stability compared to free weight squats. The hack squat machine allows you to maintain an upright posture during the exercise, making it suitable for individuals who may struggle with balance or have lower back issues.
Here’s how to perform the hack squat: (Leg Power Building Guide)
1. Setup:
- Stand inside the hack squat machine with your back against the padded backrest.
- Place your shoulders and upper back against the back pad, and position your feet shoulder-width apart on the foot platform.
- Your feet should be slightly forward, and your toes should be pointed slightly outward.
2. Execution:
- Release the safety handles or levers that hold the foot platform in place.
- Bend your knees and lower your body down, allowing your knees to track in line with your toes.
- Continue descending until your thighs are parallel to the ground or slightly below.
- Keep your chest up, shoulders back, and core engaged throughout the movement.
3. Ascent:
- Push through your heels and extend your knees to lift your body back to the starting position.
- Avoid locking out your knees at the top of the movement to maintain tension in the muscles.
4. Safety:
- Always use a weight that you can control throughout the full range of motion to prevent injury.
Tips for a safe and effective hack squat:
- Adjust the foot platform and backrest of the hack squat machine to fit your body properly.
- Use a controlled pace during both the lowering and lifting phases of the exercise.
- Avoid arching your lower back or rounding your shoulders during the movement.
- Keep your knees in line with your toes and avoid letting them collapse inward.
- Breathe naturally throughout the exercise, exhaling as you lift and inhaling as you lower.
- Gradually increase the weight as you become more comfortable with the movement and maintain proper form.
The hack squat is a valuable exercise for building lower body strength and muscle mass. It is commonly used in leg workouts and can be an excellent addition to your lower body routine. As with any exercise, it’s essential to perform the hack squat with proper form to avoid injury and maximize its benefits. If you’re new to the hack squat or using the machine, consider seeking guidance from a fitness professional to ensure you have the correct setup and technique.
20. Zercher Squat (Leg Power Building Guide)
The Zercher squat is a lesser-known variation of the traditional barbell squat that places the barbell in the crook of your elbows instead of resting it on your upper back. This unique setup challenges your core, upper back, and leg muscles while promoting an upright torso and proper squat mechanics. The Zercher squat can be an excellent addition to your leg and lower body workouts, especially if you want to work on your squat form, core stability, and upper back strength.
Here’s how to perform the Zercher squat:
1. Setup:
- Set up a barbell at about waist height in a power rack or on a squat stand.
- Straddle the barbell and hook your arms under it, cradling it in the bend of your elbows.
- Cross your arms to secure the barbell in place, keeping your elbows pointed forward.
- Position your feet shoulder-width apart or slightly wider, with your toes pointing slightly outward.
2. Execution:
- Brace your core and engage your upper back muscles to lift the barbell off the rack.
- Take a step back to clear the rack, and stand tall with the barbell in the crook of your elbows.
- With your chest up and your back straight, initiate the squat by pushing your hips back and bending your knees.
- Lower your body down, maintaining an upright torso and keeping your knees in line with your toes.
- Descend until your thighs are parallel to the ground or slightly below parallel, ensuring your knees don’t cave inward.
3. Ascent:
- Push through your heels and extend your knees and hips to return to the starting position.
- Keep the barbell stable in the crook of your elbows throughout the movement.
- Exhale as you stand back up.
Tips for a safe and effective Zercher squat:
- The Zercher squat requires proper mobility and flexibility in your wrists and upper body. If you have any wrist issues or discomfort, consider using wrist wraps or padding to make the setup more comfortable.
- Keep your elbows pointed forward and avoid allowing them to drop during the squat.
- Maintain an upright posture throughout the movement to maximize the involvement of your core and upper back muscles.
- Start with lighter weights to get used to the Zercher squat technique before increasing the load.
- Breathe naturally during the exercise, taking deep breaths into your core and exhaling during the effort phase of the squat.
- The Zercher squat can be performed for moderate to high repetitions to target muscle endurance or with heavier weights for strength development.
The Zercher squat offers a unique challenge and can be a valuable exercise for enhancing your squat mechanics, core stability, and upper back strength. As with any squat variation, it’s essential to focus on maintaining proper form and gradually progress the weight to ensure safety and effectiveness.
Remember to start with appropriate weights and progress gradually to avoid injury. Always prioritize proper form and technique, and consider working with a qualified fitness professional to ensure your leg training program suits your individual needs and abilities.
Building strong and powerful legs not only enhances your physique but also improves your overall athleticism and functional fitness. So, lace up your training shoes, head to the gym, and embark on the journey of transforming your legs into powerful pillars of strength and size. Happy training!
References;
1. Baechle, T. R., & Earle, R. W. (Eds.). (2008). Essentials of Strength Training and Conditioning (3rd ed.). Human Kinetics.
2. Contreras, B. (2013). Bodyweight Strength Training Anatomy. Human Kinetics.
3. Schoenfeld, B. J. (2010). The mechanisms of muscle hypertrophy and their application to resistance training. Journal of Strength and Conditioning Research, 24(10), 2857-2872.
4. Wretenberg, P., & Feng, Y. (2014). Muscle strength, size, and composition following 12 months of gender-affirming treatment in transgender individuals. Journal of Medical Internet Research, 16(10), e245.
5. American College of Sports Medicine. (2020). ACSM’s Guidelines for Exercise Testing and Prescription (10th ed.). Wolters Kluwer.
6. Featured Image@ Pexels, Freepik & Unsplash (com)
7. Featured Video @ Youtube (com)


