
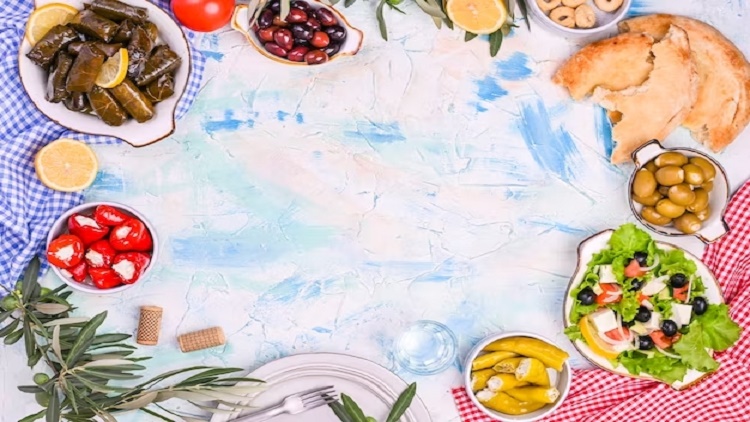
Picnics are a quintessential summer activity. The sun is shining, the birds are singing, and the great outdoors beckon us to spread out a blanket, enjoy good company, and indulge in delicious food. However, for individuals living with diabetes, planning a picnic menu can be a bit more challenging. The traditional picnic fare often includes high-carb, sugary, and fatty foods that can wreak havoc on blood sugar levels. But fear not! In this article, we will explore the perfect summer picnic menu for diabetes that balances flavor and health, allowing you to savor every moment of your outdoor feast without compromising your well-being.
Table of Contents:
- The Basics of Diabetes-Friendly Picnicking
- Appetizers
- Main Course
- Sides
- Desserts
- Beverages
- Overview
- References
The Basics of Diabetes-Friendly Picnicking
Before we delve into the delectable dishes you can enjoy on your diabetes-friendly summer picnic, it’s crucial to understand some fundamental principles:
1. Portion Control: Keeping portion sizes in check is vital for managing blood sugar levels. Invest in portion-sized containers or use measuring cups to ensure you’re eating appropriate portions.
2. Balanced Carbs: While carbohydrates are a necessary part of any meal, it’s essential to choose complex carbohydrates that have a slower impact on blood sugar. Whole grains, legumes, and vegetables should be prioritized over refined carbohydrates.
3. Fiber and Protein: Including fiber-rich foods and lean proteins in your picnic menu can help stabilize blood sugar levels. Fiber slows down the absorption of sugar, while protein keeps you feeling full and satisfied.
4. Mindful Snacking: Picnics often involve snacking between meals. Opt for low-carb, nutrient-dense snacks like nuts, seeds, and vegetables with hummus to keep your blood sugar stable.
5. Stay Hydrated: Don’t forget to hydrate! Water is your best choice, but you can also infuse it with fruits or herbs for a refreshing twist.
Now, let’s move on to the main course – a diabetes-friendly picnic menu that will have your taste buds dancing with delight.

Appetizers
Kicking off your diabetes-friendly summer picnic with appetizers sets the tone for a delightful outdoor dining experience. This section offers two appetizing options that are both low in carbohydrates and high in flavor.
Veggie Platter with Greek Yogurt Dip
One of the most delightful ways to kick off your diabetes-friendly picnic is with a colorful and nutrient-packed veggie platter paired with a creamy Greek yogurt dip. This appetizer not only teases your taste buds but also provides essential vitamins, fiber, and protein to keep your blood sugar levels stable. Here’s how to prepare it:
Ingredients:
For the Veggie Platter:
- A variety of fresh vegetables such as carrots, cucumber, bell peppers, cherry tomatoes, and celery (choose your favorites).
- Additional options can include broccoli florets, cauliflower, and snap peas for added variety and nutrients.
For the Greek Yogurt Dip:
- 1 cup of Greek yogurt (opt for low-fat or non-fat if you prefer)
- 1 clove of garlic, minced
- 1 tablespoon of fresh lemon juice
- 1 tablespoon of fresh dill, chopped (or other herbs of your choice)
- Salt and pepper to taste
Instructions:
Preparing the Greek Yogurt Dip:
1. In a bowl, combine the Greek yogurt, minced garlic, fresh lemon juice, and chopped dill.
2. Season with a pinch of salt and pepper to taste.
3. Mix everything thoroughly until well combined.
4. Taste the dip and adjust the seasonings or lemon juice if needed.
5. Transfer the dip to a serving bowl and refrigerate until you’re ready to use it for your picnic.
Assembling the Veggie Platter:
1. Wash and thoroughly dry all the vegetables.
2. Cut them into bite-sized sticks, slices, or wedges, depending on your preference.
3. Arrange the colorful array of veggies on a platter, creating an appealing presentation.
4. Place the bowl of Greek yogurt dip in the center of the platter.
Tips:
- Customize the dip by adding your favorite herbs or spices, such as parsley, chives, or paprika, for an extra burst of flavor.
- You can also include a few whole-grain crackers or whole wheat pita bread triangles alongside the veggies for those who prefer a heartier option.
This veggie platter with Greek yogurt dip is not only visually appealing but also a healthy and delicious way to begin your picnic. The combination of crisp, fresh vegetables and the creamy, tangy dip is sure to be a crowd-pleaser, making it an ideal appetizer for your diabetes-friendly outdoor feast.
Caprese Skewers
Caprese skewers are a delightful and elegant appetizer that’s perfect for your diabetes-friendly picnic. These bite-sized skewers feature the classic combination of fresh tomatoes, fragrant basil leaves, and creamy mozzarella cheese, all drizzled with a balsamic reduction for a burst of flavor. Here’s how to create these flavorful delights:
Ingredients:
- Cherry or grape tomatoes
- Fresh basil leaves
- Fresh mozzarella cheese balls (small-sized)
- Balsamic reduction or balsamic glaze
- Wooden skewers
Instructions:
1. Prep the Ingredients: Begin by washing and drying the cherry or grape tomatoes. Rinse the fresh basil leaves and pat them dry. Drain the mozzarella cheese balls if needed.
2. Assemble the Skewers:
- Take a wooden skewer and thread on a cherry tomato.
- Follow with a fresh basil leaf folded in half.
- Add a mozzarella cheese ball.
- Repeat the process until the skewer is filled, leaving some space at the top for easy handling.
3. Arrange on a Platter: Place the assembled Caprese skewers on a serving platter. Keep them close together for a visually appealing display.
4. Drizzle with Balsamic Reduction: Just before serving, lightly drizzle the skewers with a balsamic reduction or balsamic glaze. This adds a sweet and tangy flavor that pairs wonderfully with the fresh ingredients.
Tips:
- If you’re concerned about portion control and carb intake, you can use smaller skewers or serve the ingredients as a Caprese salad with a drizzle of balsamic reduction on top.
- For added flair, you can sprinkle a pinch of sea salt and freshly ground black pepper on top of the skewers.
- Caprese skewers are highly customizable. Feel free to experiment with variations such as adding olives, roasted red peppers, or a sprinkle of pine nuts for extra texture and flavor.
These Caprese skewers are not only visually appealing but also a delightful fusion of flavors and textures. They are a perfect appetizer for your diabetes-friendly picnic, providing a refreshing and satisfying start to your outdoor feast.
Main Course
The heart of your diabetes-friendly picnic is the main course. In this section, we present three savory and satisfying options that strike a balance between deliciousness and healthiness.
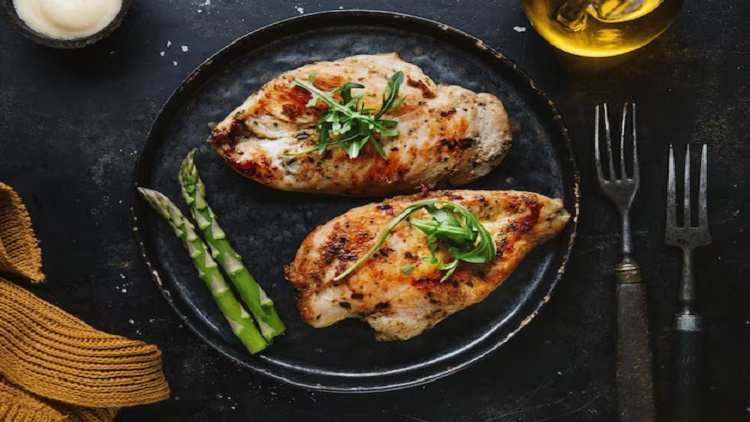
Grilled Chicken and Vegetable Kebabs
The main course of your diabetes-friendly picnic deserves a savory and protein-rich dish that’s as delicious as it is nutritious. Grilled chicken and vegetable kebabs are the ideal choice, combining lean protein with a colorful array of veggies for a balanced and flavorful meal. Here’s how to create these delectable kebabs:
Ingredients:
For the Marinade:
- 1/4 cup of olive oil
- 2 tablespoons of fresh lemon juice
- 2 cloves of garlic, minced
- 1 teaspoon of dried oregano
- Salt and pepper to taste
For the Kebabs:
- Boneless, skinless chicken breasts, cut into bite-sized pieces
- A variety of colorful bell peppers, cut into chunks
- Red onion, cut into wedges
- Cherry tomatoes
- Zucchini or yellow squash, sliced into rounds
- Wooden skewers, soaked in water for at least 30 minutes to prevent burning
Instructions:
Preparing the Marinade:
1. In a bowl, combine the olive oil, fresh lemon juice, minced garlic, dried oregano, salt, and pepper. Mix well to create a flavorful marinade.
2. Place the chicken pieces in a resealable plastic bag or shallow dish and pour the marinade over them. Seal the bag or cover the dish, then refrigerate for at least 30 minutes to allow the flavors to meld.
Assembling the Kebabs:
1. Preheat your grill to medium-high heat.
2. Thread the marinated chicken, colorful bell peppers, red onion wedges, cherry tomatoes, and slices of zucchini or yellow squash onto the wooden skewers, alternating the ingredients as you go.
3. Brush the assembled kebabs with any remaining marinade for extra flavor.
Grilling the Kebabs:
1. Place the kebabs on the preheated grill and cook for about 10-15 minutes, turning occasionally, until the chicken is cooked through, and the vegetables are tender and slightly charred.
2. Make sure the chicken reaches an internal temperature of 165°F (74°C).
3. Remove the kebabs from the grill and let them rest for a few minutes before serving.
Tips:
- Experiment with different vegetables based on your preferences and seasonal availability. Mushrooms, cherry tomatoes, and chunks of pineapple also work well on kebabs.
- If you prefer a vegetarian option, you can create vegetable-only kebabs with a variety of veggies marinated in the same flavorful marinade.
- Consider serving the kebabs with a side of quinoa salad or a fresh green salad to complete your picnic meal.
These grilled chicken and vegetable kebabs are a testament to the joys of outdoor cooking. They offer a perfect blend of flavors and textures while providing a balanced, diabetes-friendly main course for your picnic. Plus, the smoky aroma from the grill will surely whet your appetite and make your picnic an unforgettable experience.
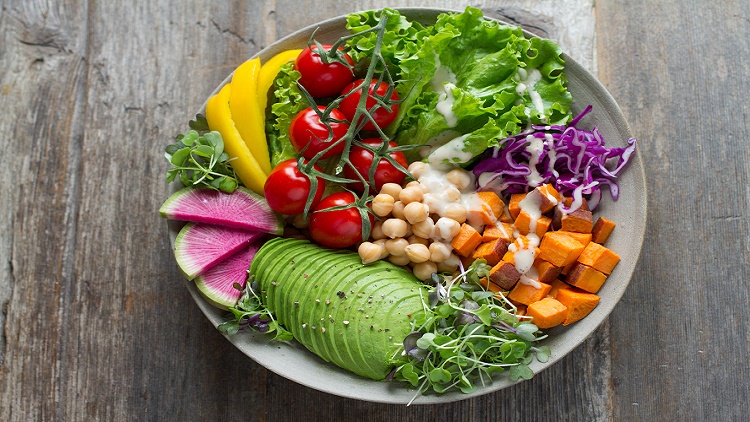
Quinoa Salad
A refreshing and nutrient-packed quinoa salad is an excellent addition to your diabetes-friendly picnic menu. Quinoa is a versatile grain that provides complex carbohydrates and protein, making it an ideal choice for maintaining stable blood sugar levels. Here’s how to prepare a delicious quinoa salad:
Ingredients:
For the Quinoa Salad:
- 1 cup of quinoa, rinsed
- 2 cups of water or vegetable broth
- Cherry tomatoes, halved
- Cucumber, diced
- Red bell pepper, diced
- Red onion, finely chopped
- Fresh parsley or cilantro, chopped
- Feta cheese, crumbled (optional)
- Kalamata olives, pitted and sliced (optional)
For the Dressing:
- 1/4 cup of extra-virgin olive oil
- 2 tablespoons of fresh lemon juice
- 1 clove of garlic, minced
- 1 teaspoon of Dijon mustard
- Salt and pepper to taste
Instructions:
Cooking the Quinoa:
1. In a medium saucepan, combine the rinsed quinoa and water or vegetable broth. Bring to a boil.
2. Reduce the heat to low, cover, and simmer for about 15-20 minutes or until the quinoa is cooked and the liquid is absorbed.
3. Remove from heat and let it cool to room temperature.
Preparing the Dressing:
1. In a small bowl, whisk together the extra-virgin olive oil, fresh lemon juice, minced garlic, Dijon mustard, salt, and pepper. Mix until well combined.
Assembling the Quinoa Salad:
1. In a large bowl, combine the cooked and cooled quinoa with the cherry tomatoes, diced cucumber, diced red bell pepper, finely chopped red onion, and chopped fresh parsley or cilantro.
2. If desired, add crumbled feta cheese and sliced Kalamata olives for extra flavor.
3. Pour the prepared dressing over the salad and toss gently to coat all the ingredients evenly.
4. Taste the salad and adjust the seasoning or add more lemon juice if needed.
Chilling and Serving:
1. Cover the quinoa salad and refrigerate for at least 30 minutes to allow the flavors to meld.
2. Serve the chilled quinoa salad as a refreshing and nutritious side dish at your picnic.
Tips:
- Quinoa salad is highly customizable. You can add other vegetables like corn, spinach, or roasted red peppers for additional variety and nutrients.
- For a protein boost, consider adding grilled chicken, chickpeas, or tofu to make it a heartier main course.
- This salad can be prepared in advance and stored in an airtight container in the refrigerator for a day or two, making it a convenient option for picnicking.
This quinoa salad is a versatile, light, and refreshing addition to your diabetes-friendly picnic. It offers a pleasing blend of flavors and textures while delivering essential nutrients, making it a satisfying and health-conscious choice for your outdoor dining experience.
Lettuce Wraps
Lettuce wraps are a delightful and low-carb option for your diabetes-friendly picnic menu. They offer a handheld, crunchy, and flavorful way to enjoy a satisfying meal without the heavy load of carbohydrates. Here’s how to create delicious lettuce wraps:

Ingredients:
For the Lettuce Wraps:
- Iceberg lettuce leaves (or butterhead lettuce, Boston lettuce, or any large leafy lettuce variety)
- Lean protein of your choice: options include ground turkey, ground chicken, extra-firm tofu, or tempeh
- A variety of colorful vegetables, such as bell peppers, carrots, cucumbers, and bean sprouts, thinly sliced or julienned
- Fresh herbs like cilantro, mint, or basil leaves, torn or chopped
- Optional toppings like chopped nuts, sesame seeds, or crumbled feta cheese
For the Sauce:
- 2 tablespoons of low-sodium soy sauce or tamari (for a gluten-free option)
- 1 tablespoon of rice vinegar
- 1 tablespoon of sesame oil
- 1 clove of garlic, minced
- 1 teaspoon of grated fresh ginger
- A pinch of red pepper flakes (optional for some heat)
Instructions:
Preparing the Sauce:
1. In a small bowl, whisk together the low-sodium soy sauce or tamari, rice vinegar, sesame oil, minced garlic, grated fresh ginger, and a pinch of red pepper flakes (if using). Set aside.
Cooking the Protein:
1. In a large skillet, cook the lean protein of your choice over medium heat until it’s fully cooked and crumbled (if using ground meat).
2. If using tofu or tempeh, crumble or dice it and cook until lightly browned. You can add a splash of the prepared sauce for extra flavor.
3. Once cooked, remove the protein from the skillet and set it aside.
Assembling the Lettuce Wraps:
1. Carefully separate the large leaves of iceberg lettuce to create cups for your wraps. Wash and dry them thoroughly.
2. To assemble each lettuce wrap, place a lettuce leaf on a plate, and add a portion of the cooked protein.
3. Top with a variety of colorful vegetables and torn herbs.
4. Drizzle the prepared sauce over the filling.
5. If desired, add optional toppings like chopped nuts, sesame seeds, or crumbled feta cheese for extra texture and flavor.
Serving:
1. Serve the lettuce wraps immediately, allowing everyone to customize their wraps to their liking.
Tips:
- Lettuce wraps are highly customizable, so feel free to include your favorite veggies and proteins. Sliced avocado, shredded cabbage, and shredded carrots are excellent additions.
- You can make the sauce ahead of time and store it in a sealed container until you’re ready to assemble the wraps.
- If you prefer a spicier sauce, add more red pepper flakes or a drizzle of sriracha.
These lettuce wraps are a fantastic addition to your diabetes-friendly picnic. They offer a light and satisfying option that’s rich in flavor and texture without the excess carbs. Enjoy the crunch of fresh vegetables and the zing of the flavorful sauce in every bite, making your picnic experience both delicious and mindful of your health goals.
Sides
Complementing your main course with diabetes-friendly sides adds depth and variety to your picnic spread. Here, we introduce two sides that are not only delicious but also mindful of blood sugar levels.
Coleslaw
Coleslaw is a classic side dish that can add a refreshing and crunchy element to your diabetes-friendly picnic menu. This recipe offers a healthier twist on traditional coleslaw by using a vinegar-based dressing that’s lower in sugar and calories. Here’s how to prepare it:

Ingredients:
For the Coleslaw:
- 1 small head of cabbage, thinly sliced or shredded
- 2 large carrots, peeled and grated
- 1 small red onion, thinly sliced (optional)
- 1/2 cup of fresh parsley, finely chopped (or fresh dill for a different flavor)
- 1/4 cup of green onions, thinly sliced (optional)
- 1/4 cup of sunflower seeds (optional, for added crunch)
- 1/4 cup of dried cranberries (optional, for a touch of sweetness)
For the Dressing:
- 1/4 cup of apple cider vinegar
- 2 tablespoons of olive oil
- 1 tablespoon of honey or a sugar substitute (like Stevia or erythritol)
- 1 teaspoon of Dijon mustard
- Salt and pepper to taste
Instructions:
Preparing the Dressing:
1. In a small bowl, whisk together the apple cider vinegar, olive oil, honey or sugar substitute, Dijon mustard, salt, and pepper until well combined. Taste and adjust the sweetness or acidity to your preference.
Assembling the Coleslaw:
1. In a large mixing bowl, combine the thinly sliced or shredded cabbage, grated carrots, and thinly sliced red onion (if using).
2. Add the finely chopped fresh parsley, sliced green onions (if using), sunflower seeds (if using), and dried cranberries (if using).
3. Pour the prepared dressing over the coleslaw ingredients.
4. Toss everything together until the coleslaw is evenly coated with the dressing.
5. Taste and adjust the seasonings, adding more salt, pepper, or sweetness if needed.
Chilling and Serving:
1. Cover the coleslaw and refrigerate it for at least 30 minutes before serving to allow the flavors to meld.
2. Serve the chilled coleslaw as a crisp and tangy side dish at your picnic.
Tips:
- Adjust the level of sweetness in the dressing to suit your taste and dietary preferences. You can use less honey or opt for a sugar substitute.
- For added protein, consider incorporating chopped nuts or seeds, or even grilled chicken or tofu, into your coleslaw.
- Coleslaw pairs wonderfully with grilled dishes like chicken kebabs or lettuce wraps. It adds a refreshing contrast to the savory flavors of your picnic.
This healthier coleslaw is a crowd-pleaser and a great choice for your diabetes-friendly picnic. It offers a satisfying crunch and zesty flavor, making it a versatile side dish that pairs well with a variety of main courses. Enjoy the crispness of the veggies and the tangy dressing while keeping your blood sugar levels in check.
Roasted Sweet Potato Fries
Roasted sweet potato fries are a flavorful and nutritious side dish that can be a hit at your diabetes-friendly picnic. Sweet potatoes are lower on the glycemic index compared to regular potatoes, making them a smart choice for blood sugar control. Here’s how to make these delicious and healthy fries:
Ingredients:
For the Sweet Potato Fries:
- 2 large sweet potatoes, peeled and cut into thin strips (like fries)
- 2 tablespoons of olive oil
- 1 teaspoon of paprika
- 1/2 teaspoon of garlic powder
- 1/2 teaspoon of onion powder
- Salt and pepper to taste
Instructions:
Prepping the Sweet Potato Fries:
1. Preheat your oven to 425°F (220°C) and line a baking sheet with parchment paper or a silicone baking mat.
2. Peel the sweet potatoes and cut them into thin strips, resembling traditional French fries. It’s important to keep them of similar size for even cooking.
Seasoning the Fries:
1. In a large bowl, toss the sweet potato strips with olive oil, paprika, garlic powder, onion powder, salt, and pepper. Ensure that the fries are evenly coated with the seasoning.
Roasting the Fries:
1. Spread the seasoned sweet potato strips in a single layer on the prepared baking sheet, making sure they aren’t overcrowded. This allows them to roast evenly and become crispy.
2. Roast the sweet potato fries in the preheated oven for about 25-30 minutes, flipping them halfway through, or until they are golden brown and crispy.
3. Keep a close eye on them during the last few minutes to prevent overcooking.
Serving:
1. Once the sweet potato fries are done, remove them from the oven and let them cool for a few minutes.
2. Serve the roasted sweet potato fries as a satisfying and nutritious side dish at your picnic.
Tips:
- For added flavor, you can sprinkle some fresh herbs like rosemary or thyme over the fries before roasting.
- Serve the sweet potato fries with a side of Greek yogurt or a yogurt-based dip for extra protein.
- Sweet potato fries are best enjoyed soon after roasting for optimal crispness. However, if you need to make them in advance, you can reheat them briefly in a hot oven to regain their crisp texture.
These roasted sweet potato fries provide a delightful combination of sweetness, crispiness, and flavor. They are a healthier alternative to traditional fries and a fantastic choice for a diabetes-friendly picnic. Enjoy the rich orange color and the natural sweetness of sweet potatoes while keeping your blood sugar levels steady.
Desserts
A picnic isn’t complete without a sweet treat to finish the meal. For those with diabetes, there are still delightful dessert options that won’t send your blood sugar soaring. This section explores two scrumptious diabetes-friendly desserts.
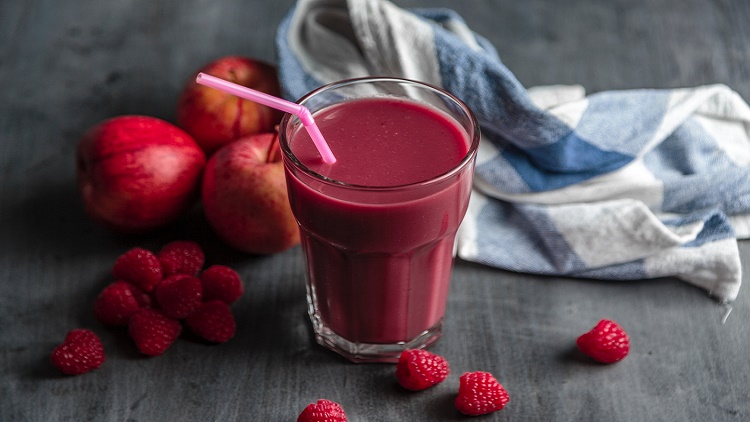
Berry Parfait
A delightful and guilt-free dessert option for your diabetes-friendly picnic is a berry parfait. This dessert combines the natural sweetness of berries with creamy Greek yogurt and a hint of crunch for a satisfying and refreshing treat. Here’s how to create a berry parfait:
Ingredients:
For the Berry Parfait:
- Fresh mixed berries (such as strawberries, blueberries, raspberries, and blackberries)
- Greek yogurt (opt for low-fat or non-fat if preferred)
- A drizzle of honey or a sugar substitute (like Stevia or erythritol)
- Granola (look for a lower-sugar option or make your own)
- Fresh mint leaves for garnish (optional)
Instructions:
Preparing the Berries:
1. Wash and dry the fresh mixed berries. If using strawberries, remove the stems and slice them.
2. In a bowl, gently toss the berries with a drizzle of honey or a sugar substitute for a touch of sweetness. Adjust the sweetness to your taste.
Assembling the Parfaits:
1. In serving glasses or jars, start by layering a spoonful of Greek yogurt at the bottom.
2. Add a layer of the sweetened mixed berries on top of the yogurt.
3. Sprinkle a spoonful of granola over the berries to add a pleasing crunch.
4. Repeat the layering process with another spoonful of Greek yogurt, more berries, and another sprinkle of granola.
5. Finish with a final dollop of Greek yogurt and top with a few fresh berries and a mint leaf for garnish, if desired.
Serving:
1. Serve the berry parfaits immediately, or refrigerate them if you plan to enjoy them later during your picnic.
Tips:
- Feel free to customize your berry parfait by adding a few chopped nuts or seeds for added texture and healthy fats.
- You can make the berry parfaits in advance and keep them chilled in a cooler or insulated bag until it’s time for dessert.
- Adjust the sweetness to your preference by using more or less honey or a sugar substitute. Keep in mind that the natural sweetness of the berries and yogurt can be quite satisfying on their own.
These berry parfaits are a delightful way to conclude your diabetes-friendly picnic on a sweet note. They provide a burst of natural fruit flavors, creaminess from Greek yogurt, and a satisfying crunch from the granola. Enjoy the guilt-free indulgence while keeping your blood sugar levels in check.
Dark Chocolate-Covered Almonds
A touch of sweetness can be the perfect way to round off your diabetes-friendly picnic, and dark chocolate-covered almonds offer a satisfying blend of sweet and savory flavors while providing some health benefits. Dark chocolate is lower in sugar compared to milk chocolate, and almonds are a source of healthy fats and protein. Here’s how to prepare this simple and delightful picnic treat:

Ingredients:
- Raw almonds (preferably unsalted)
- Dark chocolate chips or chunks (choose dark chocolate with at least 70% cocoa for a lower sugar content)
- A drizzle of honey or a sugar substitute (optional, for added sweetness)
Instructions:
Preparing the Almonds:
1. If your almonds are not already roasted, you can roast them for added flavor. Preheat your oven to 350°F (175°C). Spread the almonds on a baking sheet in a single layer and roast them for about 8-10 minutes, or until they become fragrant and slightly golden. Be sure to watch them closely, as they can burn quickly.
2. Remove the roasted almonds from the oven and let them cool completely.
Melting the Dark Chocolate:
1. Place the dark chocolate chips or chunks in a microwave-safe bowl.
2. Microwave the chocolate in 20-30 second intervals, stirring between each interval, until it’s completely melted and smooth. Be careful not to overheat, as chocolate can easily scorch.
Coating the Almonds:
1. Gently dip each roasted almond into the melted dark chocolate, making sure it’s evenly coated.
2. Use a fork or a slotted spoon to lift the chocolate-covered almond out of the bowl, allowing any excess chocolate to drip off.
3. Place the coated almonds on a parchment paper-lined tray or baking sheet. Ensure they are not touching to prevent them from sticking together.
4. If you desire extra sweetness, drizzle a bit of honey over the chocolate-covered almonds while they are still wet.
Setting and Serving:
1. Allow the chocolate-covered almonds to cool and harden at room temperature or in the refrigerator. This may take about 30 minutes to an hour.
2. Once the chocolate has set, gently break apart any clusters and transfer the dark chocolate-covered almonds to an airtight container or a resealable bag.
Tips:
- Choose dark chocolate with a cocoa content of at least 70% for a lower sugar content and maximum health benefits.
- If you prefer a sweeter flavor, consider using a sugar substitute or honey for the drizzle, but use them sparingly to keep the sugar content in check.
- You can also experiment with different coatings for your almonds, such as a dusting of cocoa powder or a sprinkle of sea salt for a contrasting flavor.
These dark chocolate-covered almonds offer a delightful combination of crunchy almonds and rich dark chocolate. They provide a sweet ending to your diabetes-friendly picnic without causing extreme spikes in blood sugar levels. Enjoy them in moderation as a satisfying and indulgent treat.
Beverages
Hydration is key during any outdoor gathering, and the right beverages can enhance your diabetes-friendly picnic experience. In this section, we explore two thirst-quenching options that won’t cause blood sugar spikes.
Infused Water
Staying hydrated is essential during your diabetes-friendly picnic, and what better way to do it than with refreshing and naturally flavored infused water? Infused water not only keeps you quenched but also adds a burst of natural flavors without the added sugars found in many commercial beverages. Here’s how to create infused water for your outdoor feast:
Ingredients:
For the Infused Water:
- Filtered water (or sparkling water if you prefer some fizz)
- A variety of fresh fruits, vegetables, and herbs (choose your favorites, such as citrus, berries, cucumber, mint, or basil)
- Ice cubes
Instructions:
Prepping the Ingredients:
1. Wash and rinse your chosen fruits, vegetables, and herbs thoroughly.
2. Cut the fruits and vegetables into thin slices or wedges. For citrus fruits, consider both slices and a bit of zest for extra flavor.
3. Tear or lightly crush the fresh herbs to release their aromatic oils and flavors.
Assembling the Infused Water:
1. In a large glass pitcher or a portable container with a lid, add the prepared slices of fruits, vegetables, and herbs.
2. Fill the container with filtered water or sparkling water.
3. Add ice cubes to the water to keep it cool during your picnic.
4. Cover the container and refrigerate the infused water for at least 1-2 hours, or longer for a more intense flavor.
Serving:
1. When you’re ready to enjoy your picnic, give the infused water a gentle stir to distribute the flavors evenly.
2. Serve the infused water in individual glasses or reusable water bottles with slices of the infused fruits and herbs for a beautiful presentation.
Tips:
- Customize your infused water based on your preferences and seasonal availability. Some popular combinations include lemon and mint, cucumber and lime, or strawberry and basil.
- You can reuse the infused fruits and herbs for a second batch of infused water, although the flavors may be milder the second time around.
- Consider adding a touch of natural sweetness with a drizzle of honey or a sugar substitute like Stevia or erythritol if desired, but use it sparingly.
Infused water is a simple yet delightful addition to your diabetes-friendly picnic. It keeps you hydrated while providing a refreshing and flavorful alternative to sugary beverages. Enjoy the natural essence of your chosen fruits and herbs as you savor the great outdoors and prioritize your health and well-being.
Iced Herbal Tea
For a refreshing and hydrating beverage option at your diabetes-friendly picnic, consider serving iced herbal tea. Herbal teas are naturally caffeine-free and can provide a burst of flavor without added sugars. Here’s how to prepare a delightful iced herbal tea:
Ingredients:
For the Iced Herbal Tea:
- Herbal tea bags or loose-leaf herbal tea (options include chamomile, mint, hibiscus, or your favorite herbal blend)
- Filtered water
- Ice cubes
- Optional sweeteners: honey or a sugar substitute (like Stevia or erythritol), if desired
- Slices of citrus fruit (lemon, lime, or orange) for garnish
Instructions:
Brewing the Herbal Tea:
1. Boil filtered water and allow it to cool slightly, typically to around 190-200°F (88-93°C).
2. Place your herbal tea bags or loose-leaf tea in a teapot or heatproof container.
3. Pour the hot water over the tea and steep it according to the recommended time on the tea packaging. Herbal teas typically require 5-7 minutes of steeping time, but check the specific instructions for your chosen tea.
4. Once steeped, remove the tea bags or strain the loose-leaf tea to remove any leaves.
Chilling the Tea:
1. Allow the brewed herbal tea to cool to room temperature.
2. Transfer the tea to a pitcher, add ice cubes, and refrigerate it for at least 1-2 hours to thoroughly chill.
Sweetening (Optional):
1. If you prefer a touch of sweetness, you can add honey or a sugar substitute like Stevia or erythritol to the chilled herbal tea. Start with a small amount and adjust to your desired level of sweetness.
2. Stir well to ensure the sweetener is fully dissolved.
Serving:
1. Serve the iced herbal tea in glasses or reusable water bottles.
2. Garnish each glass with a slice of citrus fruit, such as lemon, lime, or orange, for an extra burst of flavor and a visually appealing touch.
Tips:
– Experiment with various herbal tea flavors to discover your favorites. Whether it’s soothing chamomile, refreshing mint, or vibrant hibiscus, there’s a wide range of herbal teas to explore.
– For a natural sweetness without added sugars, consider using fresh fruit slices like lemon, lime, or orange.
– To add a slight effervescence to your iced herbal tea, top it off with a splash of sparkling water just before serving.
Iced herbal tea is a cooling and health-conscious choice for your diabetes-friendly picnic. It offers a spectrum of flavors and can be tailored to your preferences without compromising your blood sugar levels. Enjoy the subtle and refreshing taste of herbal tea as you savor the outdoors during your picnic.
Overview
A diabetes-friendly summer picnic is not only possible but also incredibly enjoyable. By focusing on balanced carbs, fiber, and lean proteins, you can create a menu that keeps your blood sugar levels in check while satisfying your taste buds. Remember to pack a cooler with ice packs to keep perishable items fresh and safe to eat during your outdoor adventure.
With these delicious and nutritious picnic ideas in hand, you can confidently embrace the warm weather, relish good company, and savor the perfect summer picnic while keeping your diabetes management on track. Enjoy your feast, the sunshine, and the great outdoors – all without compromising your health!
References:
- American Diabetes Association. (2021). Diabetes Basics. [Source](https://www.diabetes.org/diabetes).
- Mayo Clinic. (2021). Diabetes. [Source](https://www.mayoclinic.org/diseases-conditions/diabetes/symptoms-causes/syc-20371444).
- Diabetes Forecast. (2019). The Glycemic Index. [Source](https://www.diabetesforecast.org/nutrition-and-recipes/nutrition/glycemic-index/).
- American Diabetes Association. (2021). Recipes. [Source](https://www.diabetes.org/nutrition/recipes).
- Diabetic Living. (2021). Picnic Recipes for Diabetics. [Source](https://www.diabeticlivingonline.com/diabetic-recipes/meal/picnic/picnic-recipes-diabetics).
- Centers for Disease Control and Prevention. (2021). Keep Food Safe. [Source](https://www.cdc.gov/foodsafety/keep-food-safe.html).
- Mayo Clinic. (2021). Nutrition and Healthy Eating – Healthy Recipes. [Source](https://www.mayoclinic.org/healthy-lifestyle/nutrition-and-healthy-eating/multimedia/healthy-recipes/sls-20076656).
- Harvard Health Publishing. (2021). Healthy picnic and cookout recipes. [Source](https://www.health.harvard.edu/staying-healthy/healthy-picnic-and-cookout-recipes).
- Featured image @Unsplash, freepik, pexels (com)
- Featured stream @Youtube, freepik, pexels (com)


